Friday, November 25, 2011

One Ridiculously Absurd Thanksgiving Feast

This thanksgiving, we switched things up a bit and went to my uncle's house, thus totally erratically my opportunity to do any sort of cooking.  But it just so turns out that my lust for cooking might actually come from my uncle, who completely out did himself.  He prepared an absolutely delicious, and not to mention excessively large, Thanksgiving feast that for the first time in my life actually put me into a food comma. For appetizers alone we ate an entire meal.  Raw salmon with an amazing dill sauce, blue cheese tart, spinach and cream cheese rolls, and crackers and cheese.


Before we hear about and look at delicious pictures of all amazing sounding things, let's have a quick discussion about my dad and the turkey.  My dad's a fairly seasoned turkey carver, and was called in as back up when the rest of us didn't want to bother.  His technique is fantastic and he always displays the turkey in a picture perfect presentation.  This time however, he decided that throwing some of the turkey on the floor enhanced our thanksgiving, and thank goodness that he did as we had an outrageous amount of food.  But just to hassle him a bit.. let's check out my dad's floor turkey...

Oh and I guess we can look at his non-floor turkey  

Now back to the rest of the food-- if we weren't bursting at the seems after all those appetizers, we had to suck it up and move on to a deliciously seasoned turkey, a pork roast, mashed potatoes, homemade cranberry sauce, homemade stuffing, green bean casserole, roasted carrots, roasted acorn squash, roasted cauliflower, and roasted brussel sprouts.


Oh and that's not where it ends... no there was dessert.  You see, this Thanksgiving meal was indeed not for the faint of heart.  No, this was for the glutton.  So of course there was coffee and dessert.  Homemade pear and cranberry torte, apple crisp with ice cream, and pumpkin pie.


And now I'm fasting... for the next week.

Wednesday, November 23, 2011

Happy Thanksgiving From One Fruity Turkey!

Yikes!  So I totally meant to post this yesterday/ last night so it would be up here in time for Thanksgiving.  Technically speaking, you hopefully don't have your family over yet or aren't yet at the in-laws-- if so, I'm so sorry, it's going to be a looooong day.   And thus, if you're truly interested this awesome idea (of course you are why wouldn't you be), then you could take that Thanksgiving Morning walk-of-shame to your local grocery store and pick up some produce.   If not, there's always next year if you have the best memory in the entire world.

I turned this into an activity to do with my kids at work.  We practiced our fine motor skills while handling sharp dangerous objects and contaminating fruit for our parents... what could be a better activity?  Mind you, only one child, one honeydew melon, and absolutely no turkeys were hurt in making of this delightful bringer of thanksgiving cheer  (is that a thing).  And no, I'm not joking, one child was hurt.  Apparently she thought her eyeball was a superb addition to her grape skewer.  She survived and has both eyes-- no worries.  We made this for our Thanksgiving parent breakfast and it was a hit.  This is an awesome idea for breakfast, dessert, or if you're just trying to overly impress someone(s) with your creativity.


what do we need...
1 honey dew melon
1 cantaloupe (cubed)
1 bag of red grapes
2 containers of strawberries (with tops chopped off)
1 container of blueberries
1 pear
Toothpicks
Bamboo skewers

what you need to do...
1  Chop and wash all of the fruit.  In decorative patters or completely randomly, skewer (or have your kids help after clearly disclosing the dangers of bamboo skewers) the grapes, cantaloupe, strawberries and blueberries.  These fruits are the easiest but you can sub in other fruits of choice.  These can be made ahead of time and assembled later as long as they are wrapped and kept in the refrigerator.  You can make as many or as few as desired.  Filling the entire melon will require more fruit than suggested above.  Be sure to leave about an inch and a half of room from the sharp end of the skewer so that they can be secured into the melon.
2  Carefully slice the rounded bottom off the honeydew, making a flat edge so that the melon can rest without rolling.  Secure the pear on the front of the honeydew using two toothpicks and the eyes onto the pear using two blueberries and two additional toothpicks.   Stick to skewers at random into the back of the melon using the sharp end of the skewer.  After the skewers are gone, you can chop up the melon if you're in the mood for even more fruit!

Okay let's have one last look because it's adorable!  Happy Thanksgiving!!!!!! Can't wait to share the delicious things my uncle thinks up after the feast is over!

Sunday, November 20, 2011

Some Pretty Bad Ass Blueberry Lemon Pancakes

So I didn't know what to have for dinner tonight, and decided I absolutely did not want to spend any money.  That can be tricky when you don't have food on hand, begging to be prepare.  So we'll settle for pancakes, because they're delicious and cheap.  And besides, what goes better with watching The Godfather than pancakes.  Things lemon-blueberry pancakes and The Godfather have in common: they're both bad ass, and they are both... comforting?


Sorry, by the way, if you're a proponent for not messing around with pancakes.  But we have miles to go before I stop messing around with plain pancakes.

what do we need...
2 cups pancake mix, prepared as directed on the box
Zest from one lemon
Juice from 1/2 the lemon
1 cup blueberries (more or less as desired)
1 tsp baking powder
1 tsp vanilla extract 
1 tbs white sugar 
Butter for cooking


what should we do with these cheap things...
1  Prepare the pancake mix as directed on the box.  Zest the lemon into the mix and stir vigorously.  Add baking powder, vanilla, lemon juice, and sugar and mix.  Add blueberries last. 
2  Heat enough butter to coat the pan over medium high heat.  Ladle batter in small scoopfuls on to pan and cook, flipping once.  I assume you know how to prepare pancakes but you never know...

Saturday, November 19, 2011

There Has Been A Murder... But It's Okay Because There Was Also Bacon

So apparently we're 42 years old.

My friends and I love the Office.  A few weeks ago we watched an episode from the sixth season called "Murder", in which Michael attempts to distract everyone in the Office from the horrible reality of Bankruptcy with a Murder Mystery game.  So the only natural course of action, of course, was that we host our very own murder mystery dinner and wine party.  Pasta, Passion & Pistols--the Italian themed murder mystery set in New York, where Pepi Roni [astoundingly clever] was found murdered in the basement of his restaurant.


The directions were simple: everyone brings one 10 - 15 dollar bottle of wine and one appetizer.  For those in attendance who were participating in the murder mystery game, costume and crazy accent required.  I expected this to be a good time but it turns out, that was quite the underestimation.  We had an absolutely great time and everyone really brought their A game as far as the cooking and wine goes.  The food was so amazing:


Chicken Parmesan Balls
Homemade Crab Rangoon
Stuffed Mushrooms
Quesadillas
Chipotle Mac and Cheese
Bruschetta
Crackers and Cheese
Melon and Prosciutto


So naturally I took this opportunity to make goat cheese stuffed bacon wrapped prunes... who wouldn't?  They were absolutely delightful and quite ridiculous to assemble.  They went well with the wine and the other foods that everyone brought!

what do we need...
1 container of pitted prunes
1 large log of goat cheese (I think it might be 10 - 12 ounces
1 package of bacon
Toothpicks


what we need to do...
1  If you are going to immediately cook these, preheat the oven to 400 degrees.  Now this part is very technical so pay attention carefully.  You need to literally pump and finger the prunes until you open them and hallow out a large hole in the center.  This is absolutely not a joke and not an exaggeration.  You might want to do this in private, things could, will, and did get real weird when I did this with my friends in the room.
2  After you've opened all of the prunes, add a small amount of goat cheese to the center.  You can do this with a spoon and your fingers, making sure to push the cheese down inside and wash your hands in between every few prunes. 
3  Chop each slice of bacon into thirds and wrap one piece of bacon around each prune.  Secure with a toothpick and set aside on a deep sided baking sheet until ready to cook.  If you have decided you are going to cook these immediately and have preheated your oven, cook these at 400 degrees for about 20 minutes (or until the bacon appears to be crisp and cooked).


I assume you are able to figure this out for yourself but in case not... these are best when they are fresh but will be very hot inside for about 10 minutes so proceed with caution.  Delightful!

Tuesday, November 15, 2011

Mexican Paninis

Quesadillas are obviously the Mexican grilled cheese.  So then, if we slap some cheese and deli meat on a flour tortilla and melt it down, logically, we have a Mexican panini.  I don't have too much to say about this meal except that it's quick, delicious and cheap.  Also, I'm way too distracted with the wine and cheese party set up that is currently going on around me, as well as the intense hor dourves preparation that is simultaneously and loudly going on.

what do we need...
recipe prepared enough for two people
2 flour tortillas 
1 1/2 cups shredded mozzarella
2 rings pineapple, chopped thinly
1/4 lb deli ham (brown sugar maple is clearly superior)


what we need to do...
1  Preheat the oven to 400 degrees.
2  Lightly butter one side of the tortilla and place, butter side down, on a cookie sheet.  On half of the other side, add ham, pineapple and cheese.  Fold in half, press down firmly, and cook in oven.  
3  Cook for about 3 to 5 minutes, remove from oven and flip.  Return to oven and cook for another 5 minutes or until each side is slightly crispy and golden brown.  Slice with a pizza cutter and enjoy!


Monday, November 14, 2011

Someone Grab The Wok and Let's Get Asian

So it's time to play some catch up here.  I find it more than mildly impressive that we haven't consulted the soy sauce, grabbed the wok and got a little Asian yet.  Chinese food (the fake kind you order post 2 am on Saturdays) is quite possibly one of the most puzzling things on earth.  Let's reflect on their business plan:
Let's open a restaurant.  We'll make food to represent an entire culture but, let's cook absolutely nothing that anyone in that entire culture actually eats.  Then, let's cook it in kegs of fatty oil, make it available until 3 in the morning, and make it insanely addictive.  We need to make sure that indulging in this more than delicious and addictive category of food totally rapes your insides, leaving you filled with regret and feeling like shit directly following consumption.  And to top all that off, let's insert language barrier... [here].
Fantastic.
Well here's my business plan: let's make it at home, cook it in lean oil, prepare it fresh and avoid the stressful and awkward phone call during which you try to express which terribly fatty food you'd like to be brought to you in twenty minutes.  I think I'm on to something here...

So let's squint a little bit [because it's bright in here, don't be ridiculous] and get down to business.


Scallion Pancakes
what we need...
2 cups flour (plus more for dusting)
1 bundle scallions/ green onions
1 cup boiling water
Vegetable oil for  frying [plus more for spreading]
Salt


what we need to do...
[omg it's so complicated and I'm not looking forward to this]
1  In a large mixing bowl, slowly combine the flour with the boiling water until a sticky dough forms.  When  it's cool enough, combine with your hands, and kneed dough on a clean surface.  Return to mixing bowl, cover with a wet paper towel and refrigerate for 30 minutes.  
2  After thirty minutes have past, dice scallions.  Remove dough from the refrigerator and chop into four pieces.  Roll out each individual piece one at a time on a lightly floured surface.  Spread a small amount of vegetable oil over the dough, sprinkle with salt and add some of the scallions. 
3  Roll the dough into a cigar, curl around, and then re-roll out until flat again.  Okay I suck at explaining this so look at the pictures instead.


4  Repeat until all portions are ready for frying.  Heat about 2 cups of vegetable oil in a deep pan over medium high heat.  Once oil is hot, carefully place a pancake in and fry, turning at least once, until the pancake is dark golden brown.  Strain on paper towel, cut into fourths, and eat!!!


and for the fried rice:
what we need...
1 cup dry white rice
2 cloves garlic, dices
A handful of scallions
2 eggs
Dash of milk (for scrambling the eggs)
1 red pepper, chopped finely
1 yellow pepper, chopped finely
Broccoli 
1 cup [more or less to desired amount] teriyaki sauce (I used Yaki-Teriyaki Island Teriyaki Sauce)
Dash of soy sauce
Olive oil
Salt and Pepper to taste


what we need to do...
1  Prepare rice following directions on the back of the box.  Set aside.  Additionally, prepare the eggs as you would scrambled eggs and set aside.
2  In a wok, yup I said wok, or a big pan if you're lame, heat the oil, garlic and scallions over medium high heat.  Once garlic is sizzling, add the other vegetables and teriyaki sauce and cook, covered for about three minutes.  Add rice and eggs, a dash of soy sauce, salt and pepper and toss continuously until cooked to desired level of "fried-ness".


Yeah Chinese food!  
By the way, that dipping sauce is soy sauce, scallions, pepper, sugar, and ground ginger.  Play around and see if you can get a combination you like!

Sunday, November 13, 2011

Back Off Kraft-- Mine's The Cheesiest

So I just made the absolute best Mac and Cheese in the entirety of the world.  And guess what, it didn't come from bright orange powder!  I've been messing around with Mac and Cheese a lot lately-- pumpkin and beer mac and cheese, buffalo mac... And surprisingly, I've been getting a lot of sass from some true mac and cheese lovers, who are quickly tiring of my desire to mess with an already perfect creation.  So I decided to get back to basics this week and make some good, old fashion comfort food... the boring way.

It looked like this and it tasted like heaven...

This might be the best Mac and Cheese that you've ever ever tried and so, get ready.  You may NEVER go back to that powdery boxed crap (unless it's 2:30am on a Saturday) and you may never be able to enjoy any other mac and cheese again.  I'm not exaggerating.  I never exaggerate. 

what we need...
1 lb Rotini 
2 cups 1% lowfat milk
3 tbs flour
2 cups fresh grated smoked Gruyere cheese
1 cup fresh grated cheddar cheese
1 cup unseasoned panko breadcrumbs
1 clove fresh garlic, chopped
3 tbs butter plus and additional 2 tbs
Salt and Pepper to taste

how do we achieve ultimate greatness?
1  Preheat oven to 375 degrees and cook pasta according to directions on package.  When cooked, set aside in strainer.  
2  In a large pot, melt 3 tbs of butter over medium high heat.  Once butter is bubbling, add 3 tbs of flour and whisk.  Add 2 cups of milk and continue whisking over medium high heat until mixture begins to thicken.  Once the mixture has become thick, remove from heat and stir in smoked Gruyere and cheddar cheeses.  Season with salt and pepper and add pasta to the pot, mixing until pasta and cheese sauce are completely combined.  Transfer into a 9 x 13 baking pan. 
3  In a medium skillet, heat additional 2 tbs of butter and garlic over medium high heat.  When butter is beginning to bubble, add panko bread crumbs and cook over medium heat, stirring constantly to prevent burning.  Once the bread crumbs have become golden brown,  sprinkle over pasta in baking pan.  Bake Mac and Cheese for 15 minutes (or less) until sides are bubbling.  Be sure to not over cook and burn panko crumbs.
4  Yeah I know... we just made the best Mac and Cheese in the world.  What else do I need to accomplish in my life?  Right, nothing.


Saturday, November 12, 2011

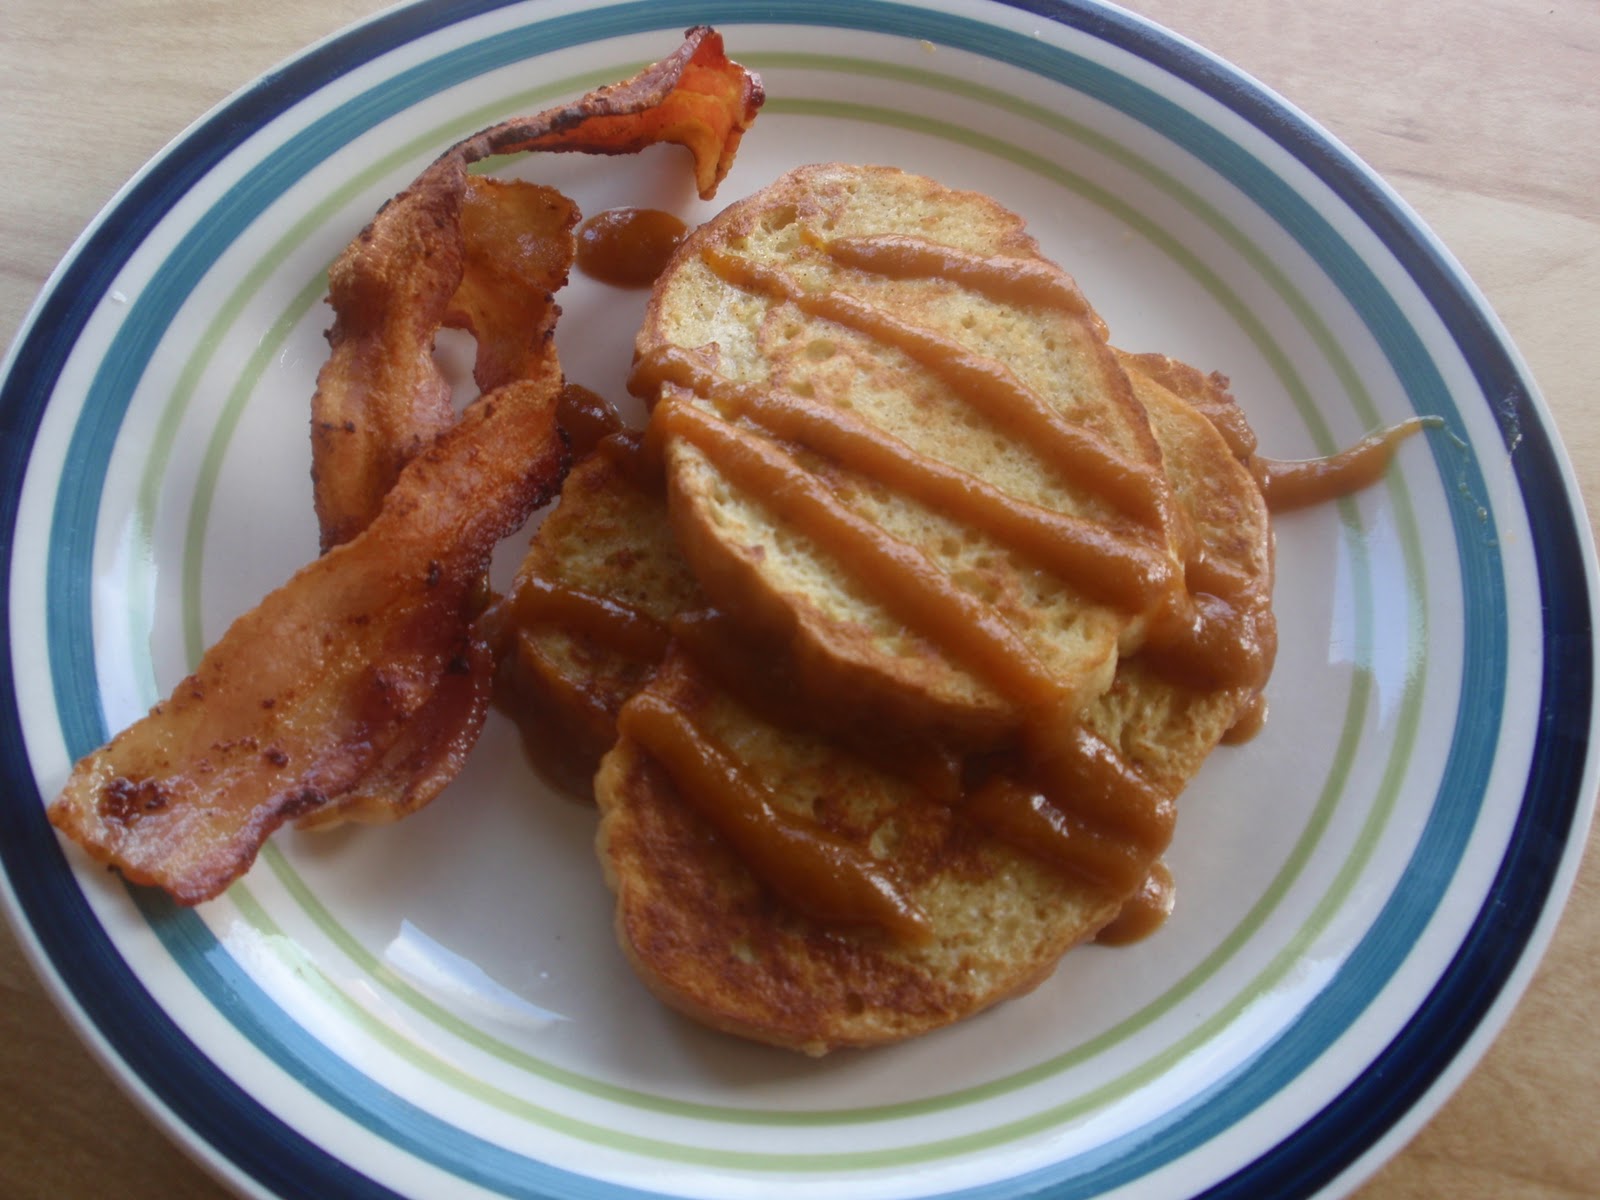
Eggy Toast

So back to savoring Saturday morning... let's chat about french toast.  Who woke up early one morning and thought, you know what would be a great way to eat these breakfast foods?  As one thing.  Let's dip this bread in toast and fry it on a pan.  Eggy Toast.  Maybe I should start coating my chicken with rice and frying it.  Ricey Chicken.

But I gotta hand it to that nutcase who thought of french toast, it's delightful.  And how have we discussed that you make something that's already great that much better?  You add pumpkin to it!  (Okay yes, I'm a little obsessed with pumpkin.  But let's get real: pumpkin season has come and almost gone so I need to really focus on eating as much pumpkin as possible before it's too late...)  Props to that Dan fellow that I'm dating for thinking of the idea and creating a pumpkin caramel drizzle.  I think I'm in love...


what you need...
for the bread:
6 pieces of bread (we used a loaf of Italian bread from the bakery)
3 eggs
1 tbs milk 
1 tbs cinnamon sugar
butter for frying

for the drizzle:
1/2 cup pumpkin puree
1/3 cup light brown sugar
3 tbs caramel (optional)
3 tbs butter

what you need to to...
1  In a large skillet, heat butter over medium heat.  Combine eggs and milk in a small bowl and whisk until well blended.  Add cinnamon sugar and beat until well combined.  
2  Once the butter is hot, dip each slice of bread in egg mixture, being sure to coat both sides so that the bread is well saturated.  Place each slice in pan and cook each side until crispy and golden brown.


3  While toast is cooking, prepare pumpkin caramel drizzle.  Combine pumpkin and butter in a small pot and heat over medium high heat until butter is melted.  Add brown sugar and caramel, reduce heat to low and continue cooking, stirring often to prevent burning.  
4  Once toast is finished, put it on a place, slap on some drizzle and get to work savoring Saturday and having a delicious and subtly pumpkiny breakfast!


Sunday, November 6, 2011

I Call It "Mr. And Mrs. Tenorman Chili"

So I'm sitting here at home on a Tuesday morning, locked in my germ infested bedroom and banned from going to work because I have strep throat.  Fail.  On the bright side, I guess that gives me some time to play catch up.  Now, don't worry, I made this on Sunday which technically speaking, was before I was diagnosed with strep throat.  So no worries... this isn't contagious.

Sundays were created for football--you wake up late, eat brunch, and then get together with your friends to drink beer, argue about football, and eat football food.
Football Food (noun): Any food, or combination of foods, most accurately classified as an appetizer (or assortment of appetizers), prepared with little to no regard for health and typically inducing near immediate food coma followed by excessive heartburn, flatulence and belching.
Sounds charming.  Why can't we make football food that tastes delicious and unhealthy, yet avoids food coma, induces only mild heartburn, flatulence and belching, and is actually good for you?  Oh we can and we will because I just did...


While Sundays are all about rivalries, one thing we can agree on is food.  Mind you, I sat in a room with four New York Giants Fans and one Jets fan watching the Jets bet the Buffalo Bills and the Patriots clumsily fall to the Giants.  And while we can't all agree on what calls were fair and what team should win, we could definitely all agree that this Sunday was delicious.   The delicious chili was healthy and hearty, and coupled with the corn bread and extremely unhealthy but also delicious nachos prepared by my friend's sister, we had ourselves a nice little collection of football food.  And look, at the end of it all, we're all still friends.
(actually this picture was taken before the games so I can't guarantee that we're all still friends...)

Just as a warning, chili needs to simmer.  It needs hours to cook in the flavors and thicken up.  We started making this chili around 11am, and ate it around 4:30pm and it was perfect.  Just keep that in mind when you're preparing this.  Additionally, this is going to make about 12 bowls of chili, so either get some friends together or get ready for some leftovers. 

what we need for this chili con carnival...
1 can chickpeas
1 can black beans
1 can red kidney beans
1 large yellow onion, chopped
6 cloves garlic, diced
3/4 bag of baby carrots, chopped
1 yellow pepper, chopped
1 red pepper, chopped
1 orange pepper, chopped
2 jalapeno peppers, chopped with seeds
1 1/2 - 2 cups tomatoes, chopped with juice reserved
2 29oz cans of plain tomato sauce 
1 lb 97% lean turkey meat
8 oz beer (can be light or dark beer)
2 tbs olive oil
2 tbs oregano
2 tbs Cajun spice
1 tbs crushed red pepper
1 tbs salt
1 tbs black pepper 

how we devise the perfect plan to destroy Scott Tenorman by creating the most delicious and devious chili of all time...
1  In a large, and I mean LARGE, pot, combine oil, onions and garlic and cook over medium high heat for about 2 minutes.  The onions should become aromatic.  Stir in 1 tbs of the Cajun spice and cook for an additional minute.
2  Add carrots, tomatoes with juice, peppers, and jalapenos and simmer over medium heat covered for about ten minutes.  
3  Now for the con carne part.  We're going to use ground turkey meat instead of Scott Tenorman's parents: one because it's healthier, leaner meat, and two because it's less diabolical.
Sorry by the way, if you've never watched/ don't like south park and have no idea what I'm talking about here.  The episode is called "Scott Tenorman Must Die" and if you're not a huge fan of South Park, I would suggest you ignore my references and avoid this episode. Especially if you're planning on making this chili.
While the vegetables are cooking and simmering together in that big old pot,  cook the turkey meat in a skillet over medium high heat.  If desired, season with a dash or oregano, salt and pepper.  Cook the meat about 3/4 of the way through, mashing repetitively to separate.  When meat is finished, remove from heat.
4  Uncover the chili and stir in the beans, and then two cans of tomato sauce.  Return heat to medium high and allow the mixture to begin to bubble.  Add meat, all of the spices, and beer and mix thoroughly.  Cover and allow to cook for about 30 minutes over medium heat, being careful not to burn the bottom on to the pan like I did).  
5  After about 20 minutes, try the chili and adjust for desired level of spiciness.  Mine came out having the perfect amount of kick--you don't want the spice to overwhelm so that you can't taste the other flavors but you also want a good spice.  If you want it spicier, add more crushed red pepper (or another jalapeno or Brazilian Rainbow peppers if you happen to have a plant laying around).  At this point, the chili should still be somewhat thin.  
6  Uncover chili and cook over medium heat, stirring occasionally.  After about an hour, the chili should thicken up.  When the chili is at desired thickness, leave uncovered and reduce heat to low.
7  When you're ready to eat, which seeing as your house will smell delicious, is probably almost immediately, serve up topped with some cheese and a side of corn bread!  Oh and some beer and football...

Saturday, November 5, 2011

Why Settle For Regular Pancakes When Pumpkin Exists?

Back to that being obsessed with pumpkin.  If you've forgotten, pumpkin is the only thing that makes not summer remotely bearable to me.  Additionally, I love the breakfast/ brunch situation that the weekends tend to bring.  Thus far, I've put it in pancakes, soup, and bread so... why not breakfast?  What's she talking about?!  Well let me tell you...

Jack Johnson once declared banana pancakes the lazy morning breakfast of choice.  Now, I completely agree, banana pancakes are pretty kick ass.  But let's not be too hasty in our pancakes ratings here... Nothing cures the hangover, fills your belly, and warms you up inside more than pumpkin pancakes!  Ooey, gooey, pumpkiny pancakes.  Don't try to argue with me and tell me that chocolate chip pancakes are heaven sent because you're know they're not.  They rank right up there in lameo-land with chocolate chip muffins.  You think it's good because you feel soooo cool for eating chocolate at breakfast time.  Get a glass of chocolate milk and spare me.

What's wrong with regular pancakes?  Nothing, but if you have the chance to make something better why would you settle for less?  Why settle for regular pancakes when pumpkin exists?  So let's pumpkin-ify some pancakes and savor Saturday morning...


what you need...
2 cups Bisquick Mix
1 cup milk
2 eggs
8 - 10 oz pumpkin puree
1 tbs cinnamon sugar
1 tbs brown sugar
1 tsp baking powder
1 tsp vanilla extract 
Butter (for grilling)


what you need to do...
1  Combine Bisquick Mix, milk and eggs in large bowl until batter is no longer lumpy. 
2  Mix in pumpkin puree, cinnamon sugar, brown sugar, baking powder and vanilla extract and blend until batter is smooth.  When you stop mixing small bubbles should form at the top of the batter.  This lets you know that the batter will yield fluffy pancakes.  
3  Heat 1 tbs butter in large skillet over medium high heat.  When butter is beginning to brown slightly, the skillet should be hot enough to cook pancakes.  Using a ladle, spoon small amounts of batter onto large skillet (should be able to fit at least two, up to three small sized pancakes).  Cook until sides begin to brown, and flip once.  Continue cooking for about a minute or so, or until pancakes are cooked through.  Repeat until all pancakes are made (should make about 10 - 15 pancakes depending on size) and serve warm!

Friday, November 4, 2011

My Buona Notte As A Little Italian Grandmother

So here I was... after a long day at work, I found myself coming home only to immediately accept my role as an Italian grandma.  How had I gotten myself here?  How had I committed to preparing an entire noodle-less lasagna for seven people?  Oh that's right-- I have a blog about cooking and once people know that, there's no getting out of cooking with slash for friends.  And yes, I said noodle-less lasagna.  Preposterous!  Outrageous!  How Un-Italian you might say.  False.  What you should be saying, is wow AWESOME.  Let's cut out some of the carbohydrates and the heavy sinking feeling that settles in somewhere 3/4 of the way through your slice of lasagna.

But back to my original and far more important point... there I was, like an Italian grandma, slaving away in the kitchen.  Thankfully, I have a best friend who truly understands me and showed up with a bottiglia di vino... what would I do without you Brittany King? (Die).


So before I even describe this deliciousness, let me preface by saying, do not make this if you do not have 2 hours of time to dedicate to non-stop cooking and don't have 8 very hungry bellies to fill.  Okay, I've done my part.  Now let's make some noodle-less lasagna.  Oh how do we do this?  Easy.  We don't use noodles.  Novel.  In fact, instead, we will personally chop 5 summer squashes into 1/4 inch or less slices, bread them with flour, egg and seasonings, fry them in canola oil, and layer them into a gigantic lasagna!  What could sound funner?  Nothing.

what you need...
for the sauce...
1 large can (32 oz) of plain tomato sauce [this is NOT prego, this is not hunt's meat flavored red juice, this is just plain old "tomato sauce".  We're not going to cheat here with store bought sauce but at the same time I'm not spending my life boiling down tomatoes to make sauce from super scratch!  We've got 2 hours of work ahead of us as it is...]
3 cloves fresh garlic, minced
5 fresh basil leaves, chopped
1/2 white (or red) onion, diced
1 tbs olive oil
a dash of red wine (optional)
Salt and Pepper to taste

for the fried zucchini/ summer squash...
5 healthy sized (yup, I just went there) summer squashes or zucchinis
8 Eggs
3 - 4 cups flour
1 tsp salt
2 tsp pepper
1 tbs oregano
1 tbs dried basil
1 cup grated Parmesan cheese (optional)
3 cups canola/ vegetable oil for frying


for the ricotta filling...
1 large container (32 oz) ricotta cheese
2 eggs
1 tbs dried oregano
1 tbs dried basil
1 tsp salt
Pepper to taste

2 1/2 cups shredded mozzarella cheese (for layering)

woah that's a lot of stuff... now what?
1  Prepare the sauce.  The longer the sauce simmers, the better the flavor will cook in.  To make the sauce, add garlic, oil and onion to a large pot and cook over medium high heat until onion and garlic become fragrant.  Add wine and basil and cook for another minute or so.  Add tomato sauce, salt and pepper (and any other spices you deem worthy or necessary) and stir well.  Allow sauce to cook over medium high heat until it begins bubbling.  Reduce heat to low and simmer, covered for as long as your heart desires.
2  Now that the sauce is simmering, let's make the fired zucchini, or as in this case, summer squash.  Begin by slicing the ends off of the squashes and then slicing them length wise into 1/4 inch thick or less slices.  Try your super hardest not to cut your whole fingers off or chop your kitten up by accident (this was the hardest part for me).


3  Once you've sliced up all the summer squash and assuming you still have all your fingers, it's time to coat the slices.  In a large bowl, beat the eggs until well blended and set aside.  On a large plate combine flour, salt, pepper, Parmesan cheese, oregano and basil.  To coat, dip each slice of summer squash in the flour mixture, lightly coating both sides.  Dip each side of each slice in egg, and re-coat each side with flour mixture.  Set aside for frying (or fry immediately if you have help)


4  To fry, heat canola oil over medium high heat until oil crackles loudly when water hits.  Place the slices in oil and fry, rotating often, until both sides appear dark golden brown.  Strain on paper towel and set aside.   
5  Prepare ricotta filling by combining all ingredients in a large mixing bowl.  
6  What has layers?  Onions, parfaits, and lasagnas so let's get ready to layerrrrr.  Start by spreading a tiny bit of sauce over the bottom of a 9 x 13 x 2 inch baking pan (this will act to eradicate that pesky stickage business).  Lay the fried slices of summer squash down to completely cover the sauce--they should be slightly overlapping.  Top with sauce then ricotta mixture then more sauce then mozzarella then more summer squash.  And thennnn, repeat until you've filled up your pan and finish the top with sauce, mozzarella cheese and fresh basil. 


7  Bake for around 45 minutes at 400 degrees, or until sides are slightly bubbling and top has become golden brown.  Wait for it to cool before you slice it otherwise you won't be able to get an awesome nice picture of all of the layers like this guy:


Oh and be sure to drink plenty of wine before, during and after this.  It's pretty tedious and exhausting so you'll at least need one bottle to stay well hydrated during this marathon of cooking.
And that's about all that this little Italian grandma has to say about that...

Thursday, November 3, 2011

Bread For Dead People!

So as most of you obviously don't know, November 1st and 2nd mark El Dia De Los Muertos, which, despite popular belief, is completely and entirely different than Halloween.  Okay not entirely.   History lesson: El Dia De Los Muertos (The Day of the Dead) is actually dos dias during which people belonging to the Spanish culture celebrate their loved ones who have passed on (that's a fancy way of saying die) by adorning their graves with flowers and constructing alters bearing offerings for their ancestors (offrendas).  Welcome to 8th grade Spanish class.

Now, because I love the Spanish culture (it kicks ass) and consider myself part Puerto Rican (I'm not), I find myself constantly excited to celebrate this way-better-than-Halloween holiday.  This year, my classroom celebrated with a short lesson by your truly about the holiday followed by a cooking project.  Obviously, we had to cook.  We made spooky masks and learned about the offerings made to the muertos, one such being Pan de los Muertos (The Bread of the Dead).  Sounds delicious right?


The kids loved this activity and making the spooky masks, so I surmise that this cooking project is perfect to do with the kids at home!  It is not only an excellent way to be involved in a cooking project, but also a way to explore a different culture.  And since I know all of you have kids...

what you need...
For the Bread:
2 cups Bisquick mix
2 tbs sugar
1 egg
[Up to] 2/3 cup of milk
10 drops Vanilla Extract 


For the Topping:
1/3 cup brown sugar
1 tbs flour
1 tbs melted butter
1 tsp cinnamon

what you need to do:
1  Preheat oven to 400 degrees and lightly grease a cookie sheet.
2  Mix all of the ingredients for bread together in a large mixing bowl, omitting the milk.  Gradually add the milk, stirring in, until the mixture becomes doughy but not too sticky.  You should be able to work with the dough without it completely sticking to everything, but this dough will not be mold-able.  
3  Add small amounts of dough to cookie sheet, spreading out about 1/2 an inch between each individual piece of bread.  Each one should be about 1 inch in diameter.  
4  Combine all of the topping ingredients in a smaller mixing bowl.  This part will be messy.  Sprinkle a small amount of topping on each dough and lightly press in so that topping is not able to simply roll off. 
5  Bake in the oven for 10 - 15 minutes and get ready to feed some bread to some dead people!  Naw that's gross.  Just eat it yourself... with your living friends.

Feliz Dia De Los Muertos!