Sunday, October 30, 2011

[Insert Unclever Joke About Balls Here]

Question, how is this a real thing: cake, frosting and chocolate coating rolled into a ball sitting atop a lollipop stick bouncing around smiling at you.  Getting the warm feeling yet?  Who thought of this cake pop business?  Because this sure isn't what the inventor of cake had in mind... This is asinine.  Naturally, we have to try it.

So as previously discussed, I work with children.  And from time to time I get moderately inspired to do nice things for them.  It's strange, I know.  With Halloween coming up, and a parade/ party to get ready for, I decided I would give cake pops a try.  These little guys are hilarious, very fun to make, and inspire a plethora of balls jokes, so be ready for that one.  And by be ready I mean, don't overestimate the maturity of three 22 year old boys because you're setting yourself up for failure.  Let's see:
Kimi can I pop one of your balls into my mouth?
Check out Kimi's schweddy balls!
Kimi, where are you going to keep your balls?
Oh my god, you're balls are so delicious
 
It's like a regular SNL skit up in here.  Very clever guys.
But silly ball puns aside, let's ball...


what you need...
1 box of vanilla cake mix (I used Halloween Funfetti)
   Also you will obviously need the ingredients to create the cake
1/2 container of vanilla frosting
1 package of lollipop sticks
2 packages of vanilla flavored white candy melts
Edible Markers (optional)

what you do with all these crafty things...
1 Prepare the cake following the directions on the box.  When the cake is finished, allow to cool thoroughly or else you're going to burn your hands.  If you wanna be impatient and ignore me, that's fine, they're your hands not mine...
2  Once the cake has cooled, transfer it into a large mixing bowl, breaking it up as you do so.  Continue to break up the cake until it has become a big bowl full of crumbs--this probably won't look or seem appetizing.  Add 1/2 can (about 8 oz) of frosting to crumbs and using your hands, mix in thoroughly.  This will create a somewhat doughy mess, similar to cookie dough texture but less sticky.  
3  Line a large cooking sheet with nonstick aluminum foil (which yes does exist and I thank Lucas Parker for this discovery) or wax paper and clear out a bunch of space in your freezer.  Enough space in fact, to fit that very cookie sheet.  Grabbing small amounts at a time, roll the cake frosting mixture into small balls--these can be sized to your preference.  Mine were fairly big, about 1 inch in diameter but if smaller balls is what you're into, keep 'em smaller! (Yes, that conversation really just happened.)  Place balls on cookie sheet and freeze for a minimum of 4 hours (overnight if you have that kind of patience but naturally, I don't).
4  When ready to start dipping, melt the candy melts following the directions on the package (I used microwave method).  To coat, dip the end of a lollipop stick into the melted candy coating and then press it firmly into the ball.  The stick should go at least 3/4 of the way into this great ball of cake.  Then, dip the entire ball into the candy coating and hold upside down to drain excess.  To dry, these must be standing up.  I used a Styrofoam block that I purchased at a craft store as a base for drying.  When dry, decorate accordingly.  That's it!  Easy as... cake?
Note: as the balls warm up, they will get harder to work with (oh boy...).  You may need to refreeze for a few minutes half way through. 

Beer Me That Mac and Cheese

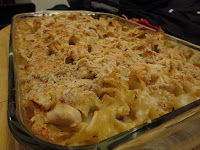
I love beer.  It's perfect, flawless, beautiful.  It's gorgeous golden glow (or dark brown hue), it's fragrant full bodied aroma, it's remarkable fun flavor with it's subtle carbonation.  Perfection.  Thanks god.  There's absolutely nothing I want more in life than to drink beer, always.  Especially with Mac and Cheese.  Especially in Mac and Cheese.  YES, let's do it... let's pour beer in our Mac and Cheese.


No I'm not joking.  Thanks to I breathe therefore I am...hungry for the inspiration for very interesting take on my favorite comfort food.  I changed a few things and would change a few things next time, but this was a unique meal that I highly recommend for one of these 5,000 unbearably cold winter nights we're attempting to endure.

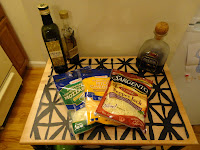
what you need...
1 lb Rotini pasta
1 cup unseasoned panko bread crumbs
2 1/2 cups 2% milk
2 tbs butter
4 tbs flour
1 yellow onion (diced)
1 clove garlic, minced
3/4 cup pumpkin puree
1/2 of a pumpkin ale or brown ale (I used Sierra Nevada Autumn Brown Ale)
8 oz grated Manchego Cheese (now see, I used this and didn't love the flavor and found myself needing 
   more cheesiness so instead I would suggest trying 8 oz grated sharp cheddar and 4 oz Gruyere cheese)
Salt and Pepper to taste

what should we do with all these crazy ingredients that don't seem to go together?
1  Preheat oven to 350 degrees.  Prepare pasta following directions on package.  Strain and set aside.
2  Chop uncooked bacon into small pieces and add to a deep skillet.  Cook over medium heat for 1 - 2 minutes, or until bacon is beginning to crisp.  Add panko crumbs to bacon and saute over medium heat for 3 - 5 minutes, or until panko crumbs appear golden brown and bacon is crisp.  Strain onto paper towel and set aside.  Wipe pan clean and return to heat, adding the butter.
3  Once butter has completely melted, add garlic and onions to pan and cook for about 2 minutes.  Whisk in flour and increase heat, continuously stirring.  Slowly add milk salt and pepper and bring to a boil, continuously whisking.  At this point, not only should your hand be real hot and your arm be mildly tired, but your sauce should be becoming thick.  Once sauce is thick add pumpkin and beer, stirring until smooth.  Add cheese and mix until cheese has melted.  
4  Add strained pasta to skillet with sauce and mix until all pasta is coated.  Transfer pasta and cheese mixture into a 9 x 13 oven safe glass dish.  Spread panko and bacon mixture over pasta, being sure to completely cover the top.  
5  Bake for 15 minutes and get ready to be warm and cozy.  Suffer from how delicious this will make your apartment, oh sorry, house smell and drink a beer.  


Awww look how artistic I can be!  And yes, that brocolini was for show. 
And that my friends, is how we add beer to our mac and cheese...

Thursday, October 27, 2011

Tostones: Slap Some Oil On Those Bananas And Let's Have Some Fun... that's what she said

It's true.  Plantains taste exactly like bananas!  They not only have the same flavor, but the same texture.  I swear, take a bite... yum.  And even better, they peel easier than bananas!  PERFECT!

False.  Plantains taste like cardboard, have the texture of Styrofoam, and take way too much effort to peel.  So naturally, we should cook with them!  Why?  Because they cost 25 cents and I know how to make them taste delicious.  As does Puerto Rico.  And the Dominican.


How do we make them delicious you ask?  I see your question and I answer it with yet another question:  How do we make anything delicious?  We fry it!  Twice!  Let's get to it and double fry some bananas!

what we need...
2 plantains
Vegetable Oil (for frying)
Salt

how we use these things to make the banana's yucky, bland, and boring cousin fun and yummy...
1  In a skillet, heat vegetable oil over medium high heat.  Oil should be about an inch deep in the pan. 
2  While the oil is heating, peel the plantains by cutting through the skin from the top of the plantain to the bottom and chopping off both ends.  Peel away skin and chop the plantains, at an angle, into inch and a half chunks.  So that was a terrible description, and I'm sure you're confused as hell, so I'll show you a picture instead...
3  When the oil is hot, add the chunks of banana and fry, rotating often, until the plantains turn golden brown.  Remove them from the oil promptly (oooo fancy words) and strain on paper towel.  While the are still hot, use the bottom of a glass to mass each banana.  Rotating the cup clockwise, press down firmly until each piece of plantain becomes flattened, like a pancake.  Sprinkle each pancake with salt and add back to the hot oil.  
4  Fry each plantain piece, flipping once, for 1 - 2 minutes on each side, or until each piece becomes crisp and deep golden brown.  Remove from oil, strain and sprinkle with salt.  Serve immediately (or place on baking sheet in the oven at 350 to keep warm) with ketchup, siracha sauce, or tobasco sauce!  These go awesome with tacos, quesadillas, guacamole or cajun chicken.  


These, by the way, are called Tostones (it's Spanish so say it with a fancy Spanish accent).  They are absolutely amazing, superbly addictive, and cost 50 cents to make so I'm not positive why you're not making them yet...

Tacos Tacos Tacos... Dan Came Up With This So That's Why It's Lame

Now... let's make some tacos to go with those tostones that you better have made by now.  How do you feel about cajun chicken tacos cause I'm feeling great about them so let's go.

Now, I want to preface with a couple of quick notes.  First and foremost, chicken is most certainly the "settle for" protein portal.  No one wakes up in the morning and says, "Oh my god, I love pan seared chicken.  It's so flavorful and interesting."  Nope.  But slap some seasonings on there and now we're up to something good.  Now we can settle for chicken.  I wanted to use blackened Mahi Mahi.  It turns out Mahi Mahi is neither cheap nor attainable and so, alas, we'll settle for chicken.  Secondly, you're not going to believe me about the sauce but you need to believe me about the sauce.  It makes all the difference.  Okay, enough talk, let's look at a picture of these delicious tacos and then start eating...


what you need...
For the tacos:
2 - 3 pieces of thin sliced chicken (depending on how hungry you are)
4 - 6 small flour tortillas (depending on how many pieces of chicken you deem necessary)
1/2 bag of iceberg lettuce
1/2 red onion
1 avocado
10 - 15 Cherry tomatoes
1 lime
Shredded pepper jack cheese
Cajun seasoning 
1 tbs olive oil
Newman's Own peach salsa (yes this is a real thing, and yes, this is product placement)

For the sauce:
1/4 cup Siracha Sauce
1/3 cup mayonnaise
Pepper 

what you need to do...
1  In a medium skillet, heat olive oil over medium high heat.  Season chicken by rubbing cajun seasoning into chicken.  Sear in skillet until chicken is cooked through or else you're going to get real sick.  Just saying.
2  Chop up all ya veggies.  Cube the avocado, halve the tomatoes, slice and separate the red onion, cut the lime, and chop the lettuce into small strips.  Yup, this part sucks, so I will once again provide you with a picture of chopped vegetables to get you through the seemingly-never-ending process of chopping.  


3  To prepare the sauce, combine all ingredients and mix.  Add more or less Siracha until sauce is to desired spiciness.  Naturally, I like things on the spicy side so maybe start out gradually and work your way up with this one.  
4  BYOT! (build your own taco, duh).  

Tuesday, October 25, 2011

Because We Haven't Quite Had Enough Kielbasa Yet...

If you don't like kielbasa, I'm so sorry.  It must have become very clear to you that I do, and that our relationship isn't going to work you.  It's not me, it's you.

BUT if you do like kielbasa then let's make it one more time just for the hell of it.  So let's recap.  Thus far we've gone to Italia and traveled to the deep south.  So clearly our next stop should be China/ Japan.  Okay, I admit it, this meal has very little to do with China or Japan and certainly doesn't fit in with my Chinese style dishes but, it does use Udon noodles and those are pretty Asian if you ask me.

This recipe was actually inspired by a party dish my mom often prepares for holidays and family gatherings.  With my love for kielbasa, naturally, her sweet and sour kielbasa became one of my favorite hors d'oeuvres.  Shout out to momma lasalle for creating something so inspiring.  But now that I'm all grown up and capable of using knives (some days), stoves and glass bottles, I've found a way to add a little kick to an old recipe! Behold:

Sweet and Sour Kielbasa Stirfry!

And you won't believe what's in it...
1/2 link of turkey kielbasa (feel free to use an entire link, I just only had 1/2 left)
1 red pepper (chopped into larger cubes)
1/2 yellow pepper (also chopped into cubes)
10 - 15 cubes of pineapple (you can buy rings prepackaged and chop)
2 7oz. packages of Udon noodles
1 12oz. jar of Heinz Chili Sauce (not cocktail sauce)
1 12oz. jar of Smuckers Grape Jelly
1 tbs crushed red pepper
1 tbs pineapple juice
2 tbs Thai Chili Garlic paste (optional)


and this is how we do it...
1  Do all that ridiculous chopping (as pictured above).  In a large, deep skillet, combine peppers, pineapple and kielbasa and saute over high heat to cook in flavors (about 5 - 10 minutes).  
2  Add bottle of Chili sauce, jar of grape jelly, crushed red pepper, pineapple juice and Thai Chili Garlic paste.  Stir well.  
NOTE:  This will not look appetizing at first.  The jelly will be all globby and gross looking but don't fear, it will soon melt in with the rest of the more liquidy ingredients and form a delicious sauce
3  Cover and allow the sauce to thicken and flavors to cook in for at least 25 minutes.  
4   While sauce is simmering, cook noodles according to directions on package and strain.  If desired, you can saute the noodles on a pan to add a little crisp.  Serve kielbasa stir fry over noodles.

This will serve two with some left overs.  Feel free to split it three ways if you use an entire link of kielbasa!  And that my friends, concludes the ways in which I have discovered to creatively prepare kielbasa using only a stove top!  Perhaps next week I will discover some other crazy way to prepare this amazing mystery meat...

So This What Happens When You're Famous

So imagine this scenario-- I woke up early this morning after a restless night of overheating, loud noises from my heater, and bad dreams.  As you can imagine, on this particular morning, I feel terrible, as I've been fighting a cold for nearly three weeks now and a restless evening certainly doesn't help.  After tripping three times on my way to work, watching the green line pull out of the station as I walked in, and freezing my [expletive] face off because apparently it's winter already, I arrive at work.  Before taking but three steps into our "cloffice" (yes that is exactly what it sounds like, a closet-office, very homey as you might imagine), I hear my co-worker Brooke exclaim, "I have a surprise for you!".  Is it that I get to go home from work right now?  Is it free money?  Is it summer?

Now, if you will recall, Brooke has previously had a cameo appearance in my blog as a naysayer to my ideas, specifically my buffalo macaroni and cheese.  But what I had previously forgot to mention was that Brooke rocks pretty hard: in the kitchen, in the classroom, and in the bedroom.  I made that last one up, I would have no idea, but that doesn't make it untrue...  Moving right along, I find myself most often consulting Brooke with advice for recipes and discussing my previous night's cooking adventures.  We can often be found spontaneously throwing together a baking/ cooking project with the kids, and have made well over 10 batches of scones since my return to work in July.  No shame in that.

I'm awful at staying on tract-- my surprise was homemade pumpkin and coconut soup and it was absolutely remarkable.  You may remember my previous discussion of my absolutely LOVE for pumpkin.  Couple that with my feeling approximately twelve feet under the freezing cold and dreary weather and we've found ourselves the perfect surprise luncheon!


If you are interested in this recipe, Brooke found it here, yet prepared it with some notable changes to the recipe!  The following [improvements] were made to this recipe, culminating in an amazing, flavorful lunchtime.   These changes were mainly to the ingredients and are as follows:


Roasted Red Kuri Pumpkin & Coconut Soup
serves 6 as a main course
4 to 4 1/2 pounds red Kuri squash * (See Note)  One Pie Pumpkin
2 tablespoons vegetable oil or butter  Olive Oil
4 2 cloves garlic
4 small shallots  1 yellow onion
1 tablespoon fresh grated ginger, from a 3-inch long piece
2 tablespoons tomato paste
1 teaspoon curry powder
1 dried red chili, about 2 inches long  Red Pepper Flakes
One 13.5 ounce  1/2 can light coconut milk
4 cups chicken or vegetable broth
1 1/2 teaspoons salt
Juice of 1 lime, about 2 tablespoons  Lemon Juice
And for the topping:  Roasted Pumpkin Seeds! (yeah it doesn't get much better than that)

Goodbye boring oatmeal/ banana, hello delicious pumpkin soup!  Thanks so much to Brooke for finding, preparing and sharing this absolutely delicious recipe!  AND congratulations on your upcoming wedding! :
)  I wonder what surprises tomorrow will bring......

Thursday, October 20, 2011

A Very Quick Meal to End a Very Loooong Day

In case you were interested, I work at a daycare.  In case you don't know what that is like, it is like playing academically oriented mommy to 18 three and a half year olds every day.  It's the best and I love it.  But let me tell you something about working at a daycare-- it can be exhausting.  Let's look at an example of my day to day responsibilities.  This week at work I engaged in the following activities:

-  Played tag
-  Cleaned up throw ups
-  Watched a three year old poop
-  Listened to Club Can't Handle Me Kids Bop version on 6 separate occasions
-  Drew two pumpkins, one spider, and 348 butterflies
-  Listened to a 30 year old man, whose name we will change to Teddy for the purpose of this post, read the same book 15 times
-  Caught a cold
-  Ate Indian food

So as you can clearly see, my week has been largely exhausting.  And there's truly nothing I want more at the end of the day than to come home and relax.  By 5 pm on any given week day, I'm hungry, tired, sick, and usually grossed out.  And then there's dinner to worry about.  I love cooking, as you can probably assess based on this food blog, but some days, I don't want to wait for my garlic to roast.  I want something I can whip up in eight minutes or less.

So since this blog is all about quick cheap meals, let's get away from the whole roasting garlic, caramelizing onions, and waiting for casseroles to bake thing and get quick.  Question.  What quicker than a meal that takes 8 minutes?  Fact... anything that takes 7 minutes or less.   BUT, all of that aside, being able to whip up a meal for two with only three ingredients, in eight minutes or less for around 12 dollars total, is pretty kick ass.  Especially when it involves kielbasa and looks like this:


yes, this is seriously all that we need...
1 package frozen tortellini (we used Shaw's brand because it's the cheapest and personally, I think it's way
       better than the packaged Barilla business)
3/4 small container of Buitoni All Natural Pesto with Basil
1/2 link of Hillshire Farms Turkey Polska Kielbasa 


what we need to do with these three things...
1  Boil water for pasta and cook tortellini.  It has thus far been MY personal experience that packages of tortellini tell you to boil them for 10 minutes, however, I find this to be lies.  Cook the tortellini until most of them are floating (about 4 -5 minutes) and strain.  Return to pot.
2  While the pasta is boiling, cut the Kielbasa into slices and cook on skillet over medium high until both sides of kielbasa are browning!  And since that was the worst description ever, let's look at a picture:
3  Combine cooked kielbasa and tortellini pot and toss with the pesto.  If desired, add more pesto and top with black pepper.   


Yes, it was that easy.  Yes, it was that cheap.  Yes, it was that filling.  Oh and last thing, yes, it was that delicious...


Just a side note and a shout out to my awesome preschoolers and teachers.  On Tuesday, we celebrated one of my co-workers' birthdays.  As we are learning about the letter "D" this week and preparing for all the spookiness of Halloween, we prepared Dirt Cake for her together!  Check it out below-- thanks to Aileen and her ipod, "oh I'm sorry it's an iphone", for this awesome photo!


Thumbs up to being three and a half again!

Tuesday, October 18, 2011

Crispy Sandwiches Call For Crispy Sweet Potato Fries

It's time to talk about panini's, also known as the best ever food, ever.  Seriously though, what did the world do before the person who decided pressing that boring soggy sandwich they were eating was a good idea.  Did people really eat regular sandwiches?  Impossible.  I literally turn any sandwich I make into a panini.  Turkey and cheese, press it.  Vegetable and hummus, press it.  Fresh tomato, basil and mozzarella, press it.  Honestly, if I ate peanut butter and jelly/ fluff, I would press it.

Why you ask?  Oh really, tell me a hot, crunchy, cheesy sandwich doesn't sound amazing.  If that doesn't sound good to you, I have no answers for you.  You have a long, sad, lonely life ahead of you plagued by cold deli meat atop soggy, flavorless bread.  I feel for you.

I press anything and everything I can, and despite my sincere passion for panini-ing things, I coincidentally don't own a panini press.   How does she do it?!  I mean, I own pans so...

Another of the best things in the world, sweet potato fries.  Remember that extensive conversation we had about how much better sweet potatoes really are?  I'm serious about this.  I can't pass these puppies up, regardless of what menu I see them on.  I would get these if I saw them right up there next to Pho on a Vietnamese menu.  Sweet potato fries are awesome, and quite frankly, leave boring potato fries in the dust.  Not only are they more delicious but, if you follow the oven cooking school of thought, they are a thousand times healthier than those grease soaked, flour covered, potato sticks.  However, if you've ever tried making sweet potato fries, you know they can be tricky little guys--they're hard to get the perfect amount of crispy while also becoming the perfect amount of soft inside.


So what are we getting at here?  The perfect meal for a cool fall night.  Pesto Chicken, Tomato and Mozzarella Paninis with a side of Sweet Potato Fries!  Boom, roasted.  A couple of important disclaimers:

  • Bread matters!  I'm about to tell you to use bakery fresh bread.  And you're about to ignore me, buy wonder bread, and ask me what's so special about this sandwich.  Save yourself the trouble and skip over this if you're not ready to buy bread from the bakery section of your supermarket (or local bread store) and want to keep it simple in the plastic-wrapped-all-things-that-have-yeast-in-them-mess of a "bread" aisle.  My recommendations:
    • from grocery store bakery: Rosemary Olive Oil Bread by Culinary Circle
    • from Panera:  Tomato Basil Loaf (sliced thick, 3/4 inch)
  • Don't cut the time on the sweet potato fries.  They will be soggy and they will be greasy.  Or, you'll try to broil them too quickly, and you will have raw potatoes with black on the outside.  Yum.
Okay, now that that's out of the way, let's get going.

for the fries...
1 sweet potato
1 - 2 tbs olive oil
Garlic Salt
Salt (optional)
Rosemary
Black Pepper


how we do it...
1 Preheat the oven to 450 degrees.
2  Chop the sweet potato half, and then halve those halves.  Cut those halved halves into 1/4 inch thick strips, lay them on their sides, and cut those strips into two or three small strips.  They should start looking like french fries now.  Note that you don't have to skin the potato.  It's totally based on preference here.
3  Once the potato has been entirely chopped into strips, place on baking sheet, and drizzle with olive oil.  Toss so that all of the fries are coated.  Season with garlic salt, rosemary and black pepper.  I don't want to get to specific on how much here as it really is to your taste--I'm not a huge fan of salt so I went easy on the garlic salt, omitted regular salt, doused them in rosemary and gave them a healthy serving of black pepper.  
4  Roast in oven for 25 minutes, turn and roast for another 15 minutes, or until the fries are crispy.  If the fries are still not to your desired crispiness after this additional 15 minutes, crisp under broiler on high for 1 - 2 minutes on each side, turning once.  When done, strain on paper towel and keep warm in oven on 250 degrees until ready to serve.


and for the panini...
1 piece of thin sliced chicken
2 pieces of bakery fresh bread (used Tomato Basil Bread from Panera)
3 slices of fresh mozzarella (from mozzarella ball)
3 slices medium sized tomato (globe tomatoes)
2 tbs pesto (homemade or store bought Barilla)
1 tbs butter
1 tbs olive oil
Dried Basil
Black pepper

Fresh Basil (optional)
Garlic Salt (optional)


how we do it...
1  Season the chicken with dried basil and black pepper (also garlic salt if you decide to use).  Cook chicken all the way through and strain on paper towel.  Slice thin to fit bread being used.  
2  Spread 1 tbs pesto on each slice of bread and build your sandwich.  Mozzarella first, tomato, basil (optional), chicken and close with other slice of bread, pesto side down.  Now let's do the impossible and press this bad boy without a panini press!
3  Melt a tablespoon of butter in a pan over medium high.  When butter is bubbling, carefully move your sandwich into the pan.  Using a spatula, firmly, but not too firmly, press your panini for 10 - 15 seconds.  Repeat this process until underside looks browned/ toasted.  Flip panini (you might need an additional spatula depending on how much you load into your panini), and again, press the panini for 10 - 15 seconds. Cover the panini at this point and cook until cheese is beginning to melt.  Be sure to check that the underside isn't burning.  If bottom is crisping too much, flip and recover repeatedly.  When both sides are browned to your preference, remove from skillet, slice, and enjoy!


Like I said, paninis are amazing.   Especially homemade ones.   So there Panera, I just used your own bread to out-panini you. What about it.

Monday, October 17, 2011

When A Brownie Dates A Cookie And Makes A Baby

AND NOW FOR DESSERT!
I wasn't going to post this up here, but my friends said I should.  This dessert is quick and easy to make--literally it's not even a recipe, but just a meeting and love affair between two delicious boxed desserts.  I love baking for other people and this was popular tonight so here it is... The Cookie Brownie.  About time right.  And yes, it's really this easy.

what you need...
1 Box Ghirardeli Double Fudge Brownie Mix
1 Package of Tollhouse Break and Bake Cookies


what you need to do...
1  Preheat oven to 325 degrees. 
2  Prepare brownie mix according to directions on the back of the box.  Grease a medium sized muffin tin and transfer the brownie batter evenly into twelve of the cups.  
3  Break up the cookie dough and drop over the top of the brownie batter.  You will need about 8 of the cookie squares for this.  
4  Bake for 35 minutes at 325 degrees.  Allow to cool and then remove from muffin pan using a sharp knife to break free the edges of the brownies.  SO DELICIOUS AND SO EASY!

How's A Little Italian-Indian Fusion To Shake Up You're Beloved Pizza, New York...

I love pizza, sometimes.  I'm not talking about the New York vs. The World pizza (yep New York, we all know you and your "pie"s think you are better than everywhere else).  I'm not talking about the thin, flavorless, greasy, hot cardboard that you get post-2am, pre-6am.  I'm not talking about slapping some red sauce and crappy "four cheese" blend onto frozen pre-made dough.  Alright, so I guess I don't really LOVE pizza, but I like it enough... when it's fancy and unique and fun to eat.

And THAT is why we are about to whip up some Naan Pizzas.  Yup, you heard me right... Naan.  Am I be the first to have created the Italian Indian Fusion Cuisine?!  Probably not, but that would be pretty kick ass.  Talking about portion control, these are perfect as personal pizzas.
DISCLAIMER:  THESE WILL LEAVE YOU WANTING MORE EVEN AFTER YOU'RE FULL AND BECAUSE THEY ARE THAT DELICIOUS.  DON'T GIVE IN.  YOU WILL EXPLODE AND DIE.  TRUST ME, YOU WILL.
And for you vegetarians out there (or just for all you fungus lovers), these are quickly and easily converted by replacing the sausage with portabella mushrooms.  Recipe below serves two! Alright let's get to this...

what you need...
2 links Sweet Italian Sausage OR Sliced Portabella Mushrooms
1 Yellow Onion, in slices (NOT chopped)
6 cloves Roasted Garlic 
2 Pieces of Garlic Naan or Original Naan (I use Culinary Circle)
1 cup Shredded Mozzarella Cheese
4 tbs Fat Free Ricotta Cheese
2 tbs Sugar
1 tbs Butter
6 Sage Leaves
Rosemary
Pepper

how you do it...
1  Preheat oven to 400 degrees.  Weird, it's like we always seem to be preheating the oven these days... (and yup that's a preheated oven over there in case you were wondering)
2  If you haven't roasted the garlic, I would suggest doing it now.  It takes about 40 minutes to roast a head of garlic.  If you've already forgotten, directions on how to roast garlic can be found here.  If you already have your garlic roasted, ignore step two and skip to step three. 
3  Alright, so here we are with a preheated oven and a head of roasted garlic.  So let's caramelize some onions!  Melt 1 tbs butter in a skillet over medium high heat.  Notice here that we are going to speed caramelize the shit out of these onions because, I don't know about you, but I don't have an hour and a half to sit around and slow cook onions.  When butter is bubbling, add yellow onion and sprinkle with sugar.  Cook over medium heat until onions appear golden brown.  Taste and add more sugar to your desired taste.
NOTE: ONIONS ARE APPARENTLY REAL HARD TO CARAMELIZE.  ASK DAN.  CAREFUL WITH THIS PART, IT'S NOT AS EASY AS IT SEEMS... (DON'T SAY I DIDN'T TELL YOU SO).  ALSO, START OVER WHEN YOU SCREW UP, BECAUSE THESE ARE  IMPORTANT TO THE FLAVOR.
 Okay!  Let's cook some sausage (or portabella mushrooms).  If we're using sausage, slice sausage, and heat in skillet over medium high heat until all sides are crisped and sausage is mostly cooked through.  You don't need oil to cook the sausage, it has plenty of fats and oils that will cook out to keep it from cooking.  *If you are cooking mushrooms, you will need an additional tablespoon of oil.  Cook the mushrooms over medium high heat for 1-2 minutes on each side.  
5  Alright let's put this thing together!  Take your Naans and spread three cloves of roasted garlic over each.  If you want it more garlicy, I'll give you three guesses as to what to do.  Add the caramelized onions, sausage/ mushrooms, and mozzarella cheese to the pizzas.  Add ricotta cheese by spreading out small dollops around each pizza.  season with 3 sage leaves per pizza, rosemary and black pepper.  
6  Cook in oven at 400 degrees for 10 minutes (or until the cheese appears melted and the sides of the Naan are beginning to brown).  Switch oven to broil and broil on high for 1-2 minutes or until the ricotta cheese on top begins to brown.  Slice and serve!


Not a great picture but it was too delicious to look at, take pictures of, and not eat...

Sunday, October 16, 2011

Dan's Special Sauce

This is Dan.


He's witty, nerdy, sometimes charming, occasionally handsome and he just so happens to be the adorable fellow that is dating me.  Yep, this is who I cook for every night, and because of that, he puts up with me everyday.  How could you resist?

Well consider this a quick little shout out to my darling boyfriend and his delicious sauce.  Yeah, that sounded raunchy but, I'm serious.  This boy can cook.  I want to sit here and pretend that I taught him everything that he knows, but that is largely untrue.  When I met Dan freshman year, I was burning boxed mac and cheese on the reg.  Dan is the reason I got interested in cooking, and without his inspiration, I might never have picked up the wooden spoon.  Okay, sappiness aside because I'm getting grossed out, Dan's like a little old Italian grandma.  He prepares amazing Italian dishes, chops garlic like a pro, and makes a sauce that will keep you coming back for more......

Where is all this nonsense going?  Well, today I came home from a strenuous day of laundry and shopping with the girls, to this:


Chicken Parmesan with homemade Tomato Sauce!  It was absolutely delicious and too gorgeous to not snap a photo of, even if we had to take it on my old broken camera (which he of course broke).  Thanks Dan, you're a best--maybe he'll have to be a guest star up here from time to time!


awww...

Saturday, October 15, 2011

NO SOUP FOR YOU!!!

Let's talk about soup real quick.  If you're going to seriously sit there and tell me, "oh I love soup, it's the absolute best, wahhh" then get off my blog.  Nobody LIKES soup.  It's not filling, it's hard to eat, and unless you make it from scratch, it's boring, flavorless and salty.  Pumpkin soup is good.  Squash soup is pretty rockin'.  Tomato soup is good, but only with grilled cheese, so that's a big blow to it's credit.

Think about it... It's the perfect thing for when your sick.  It's the perfect food for when you feel so terrible that you can't even taste food.  It's the perfect food for when you feel as though it is a waste of time and money to pay for anything with flavor, so you settle for something hot with vegetables floating around in it.  Sounds great huh?  No I didn't think so.

So how do we make it good?  We make it ourselves.  What if we don't want to?? Then we add crack... perfect!  Settle down, we're not adding crack but this is my version of chicken noodle soup, on crack.  This recipe makes a mass amount of food-- four boys and I couldn't finish 3/4 of this.  It's a lot, but it's delicious.  I know, I know... two casseroles in one week?  I apologize.  I guess fall really has gotten the best of me already.  Credit to Campbell's soup for the inspiration for this recipe.

what you need...
2 lb bag of Egg Noodles
3 pieces of thin cut chicken
2 small cans of Campbells Cream of Mushroom Soup
2 small cans of Campbells Cream of Chicken Soup
1 head of Broccoli / 1 Bundle of Brocolini (optional)
1 yellow onion, chopped (optional)
1/4  cup shredded mozzarella cheese
1/4 cup shredded cheddar cheese
1 cup breadcrumbs
1 tbs Adobo Seasoning
Oregano
Pepper to taste


how you do it...
1  Preheat oven to 400 degrees.  Prepare noodles according to directions on package. 
2  Season chicken with Adobo Seasoning and Pepper and chop into bite sized pieces. 
3  When pasta is finished, strain, and transfer into a 9 x 13 pan.  Add the Cream of Mushroom Soup and Cream of Chicken Soup and mix until all noodles are coated.  Add chicken, desired vegetables, mozzarella cheese, and cheddar cheese to noodle and soup mixture.  Mix. 
4  Top with breadcrumbs and bake at 400 degrees for 35 minutes, checking that the chicken cooks through, adding additional time if needed.  Crisp under the broiler on low for one minute, until breadcrumbs are browned and enjoy!  


My guy friends made some garlic bread and mesquite corn to serves with this, and it was very yummy!  This was a delicious, quick and easy meal for a cold fall/ winter day.  Additionally, it kicked soup's ass while still remaining the perfect dish for when you're somehow feeling under the terrible fall/ winter weather.  So next time you're thinking soup, just don't.  Make this instead.  

Friday, October 14, 2011

Buffalo Mac and Cheese! Yep, that's as creative as we're getting today.

So let's chat, real quickly, about rain in Boston.  I've spent the past two days trying to find a polite and eloquent way of phrasing what I want to say here, but alas, I've been defeated by the unattested awfulness of the rain in this city.  Some things I don't understand about Boston and it's relationship with the rain/ weather in New England:
a. why did we build and entire city, located within the depths of New England (where, if you've forgotten, it rains, snows, sleets and ices) completely out of bricks?
b. why does it only rain during your commute to work?
c. and why does it rain the hardest during your commute to work when you are carrying 26 pounds of pasta for a potluck lunch at work?
If you can answer those questions reasonably, we'll chat.  But since it's impossible, I'll just let you know that the cause for this current rant is that lovely letter c we discussed above. 

So there I was, walking down Huntington Avenue, my khakis rolled up, rain beating down on my lack of raincoat/ umbrella/ rain boots/ and appropriate non-flip-flop shoe attire, carrying somewhere around 10 pounds of buffalo macaroni and cheese.  Failure to thrive.  Did I get a seat on the T?  No, of course not.  Did I slip and almost fall on 5 seperate occasions. Of course I did.  But do I have any regrets that I went through all of this trouble to bring my co-workers homemade buffalo macaroni and cheese?  Yeah, of course I do (no offense guys)!  Thanks a lot mother nature-- awesome that you decided to deliver us three consecutive days of the worst fall weather ever, but my buffalo mac and cheese and I don't appreciate it. 

But bitterness aside, we should probably get to making this.  I've made this two different ways, the most recent being the way I liked least.  So, I'm going to show you pictures from this time that I made this but provide you with directions from the last time!  It's going to make a significant amount less than what's pictures, because unless you need to feed a healthy sized portion of the marine corps, then making this amount is not only excessive but also stupid... almost as stupid as carrying this amount, through the pouring rain, wearing flip flops, to your work luncheon.


for the buffalo chicken part...
3 pieces of thin cut chicken
1/2 cup buffalo sauce
Salt and Pepper to taste


for the mac and cheese part...
1 lb (this equals on box for those of you who can't read pasta boxes) of Medium Shells
2 tbs of butter
1 1/2 cups of milk
1/2 block of pepper jack cheese, cut into small, thin blocks
1/2 cup shredded pepper jack cheese
1/2 cup shredded cheddar cheese
1/4 cup mozzarella cheese
1 cup breadcrumbs
1/2 cup buffalo sauce (I use KC Masterpiece Buffalo Sauce)
1 small bundle of chopped scallions (green onions)
Salt and Pepper to taste


how do we do this thing?
1  Using a fork, poke holes in the chicken.  Cut into bite sized pieces, and marinate in a ziplock baggie with buffalo sauce, salt and pepper.  Allow chicken to marinate for at least 30 minutes before cooking, overnight for most tasty results.
2  Preheat the oven to 375 degrees and prepare pasta as directed on box, and after straining, add to a 9x13 baking pan and mix with butter.  Add shredded pepper jack and cheddar cheeses to pasta and mix.  Add the cubed pepper jack cheese and chicken pieces, spreading the pieces out around the pan and nestling them right in there with the pasta.  Note: cooking the chicken ahead of time will cause it to overcook and dry out.  If you like dry, flavorless chicken, then that's the route for you.  But if you're a human, don't cook the chicken first!
3  Pour milk evenly over pasta (you should see it settle to the bottom of the pan).  Drizzle the buffalo sauce over the pasta , cheese and milk mixture.  
4  Top with mozzarella cheese and breadcrumbs and bake in oven for 25 minutes.  If you want the top to get crispier, throw under the broiler on low for about one minute.  


                                             Before                                                   After
5  When this awesomeness is finished cooking, top with scallions and serve immediately so that it's super piping hot and all cheesy melty.  Yes, that's a professional term.  


Now, buffalo macaroni and cheese might sound confusing and as thought it might not be awesome.  I'm not going to directly mention any names here, but one of my co-workers, Brooke, had some pretty firm doubts regarding whether or not this could even be remotely edible.  Well, consider those outlandish doubts demolished.  This is delicious and like nothing you've ever gotten from a box so go make it right now!  Or later.  That's fine too!  


Happy Weekend!  :)

Hey There Regular Potatoes, Sweet Potatoes Just Kicked Your Ass

So this is what happens when you get home from work at 7 at night and need to throw together something for dinner--apparently things get real southern real fast.  Kielbasa is one of the best things on earth, period.  And then there's turkey kielbasa, which just so happens to have half the fat of Polska Kielbasa and all the deliciousness.  Thanks god.  I also want to take a moment to thank you for sweet potatoes.  Seriously, I don't know who I would be without sweet potatoes.  Regular potatoes, you just got handed a can of whoop-ass from your way better tasting  and very strangely bright orange brother.


So one day, when I was thinking about these unrealistically delicious foods which I love more than almost everything except ice cream, I realized the desperation for these two ingredients to meet, date and make a delicious dinner.  And that, my friends, is how this quick fix, straight from the south, perfect with corn bread meal, came to be.  Be prepared, if you're ready which you might not be, because this is among some of the awesomer, easy to make things you've ever experienced. 

what we'll need to create this pure awesomeness...
very large sweet potato (or 2 medium sized ones)
packaged link of Turkey Kielbasa (or Polska if you're feeling dangerous)
cup of BBQ Sauce (I use Sweet Baby Ray's but it's up to you)
1/3  cup of yellow mustard or spicy brown (for a little kick!)
1  tbs of olive oil
Dried Rosemary
Salt and Pepper to taste


 what we'll need to do...
1  preheat the oven to 400 degrees.  Chop the sweet potato into cubes and put in a square baking pan so that none of the potatoes are overlapping.  Drizzle with olive oil and season with salt, pepper, and rosemary.  Roast in oven for 40 minutes or until the potatoes are soft.  SOFT, do you hear me?  Don't cheat on this just because you're starting to feel hungry, because let me tell you, eating uncooked potatoes totally sucks....


2 while the potatoes are cooking, but not until there are about 15 minutes left, chop the kielbasa into rounds and cook on stove top on medium high until both sides are slightly browned and it smells unbearably awesome in your kitchen.

 yup... this is a bunch of sausage in a pan, in case you've never seen that before...

when the kielbasa is done cooking, reduce heat to low and add sweet potatoes, barbecue sauce and yellow mustard to pan.  Mix together  over low heat until the sauces are combined and warmed.  Serve topped with dried rosemary, corn bread and a beer. 


You're welcome.
JUST FOR THE RECORD: I SPELLED POTATO WRONG 8 TIMES IN THIS POST.  THANK YOU, SPELL CHECK, FOR NOT ALLOWING THAT EMBARRASSING FACT TO GO UNNOTICED.
Shout out to my sister for this idea!
Serves: 2 ravenous people, 3 people with a regular appetite
Estimated Cost: $15 total
Price Break Down:
   5 for the kielbasa
   5 for the BBQ Sauce
   3 for the mustard
   2 for the sweet potatoes

Tuesday, October 11, 2011

the sexiest thing you can do with an ugly, mushy, brown, pitted fruit thingy...

While we're on a Mexican kick here, let's have a little chat about Mexican cooking.  I mean, come on people.  Empanadas and Chimichangas, Burritos and Quesadillas... really, no one sees a problem here?  I can combine cheese, flour tortillas and mystery meat, give it seven different names, and shove it directly into your arteries too.  Thanks Mexico.  But grease and cholesterol aside, there are some things I specifically appreciate about Mexican Cuisine.  If you've never had Churros, I'm so sorry.  If you've never had a Margarita, why?  And if you've never had Guacamole, well, you're just plain wrong.


I remember the first time I tried Guacamole, because the first time I tried guacamole, I threw it up and wrote off Mexicans and their shitty cooking for the rest of forever.  It was the worst day of my life and in hindsight, it was the worst mistake of my life.  Guacamole is the food of the gods, the sexiest thing you can do with that ugly, brown, mushy, abnormally largely pitted fruit thing.  It is everything right with life and I shun my childhood self for disliking such a heavenly creation.


Now before you waste your time reading any farther, buying these ingredients, or making this Guacamole, I must provide you with a serious disclaimer:
IF YOU DO NOT LIKE ONIONS, GARLIC AND/OR LIME YOU ARE NOT GOING TO LIKE THIS GUACAMOLE.  THAT IS, THERE ARE A LOT OF RED ONIONS, A LOT OF GARLIC, AND A HEALTHY DOSAGE OF LIME IN THIS RECIPE.  SO IF YOU DISLIKE THESE INGREDIENTS, LEAVE NOW OR DON'T COMPLAIN TO ME WHEN YOU DON'T LIKE THIS.
Also, Guacamole is a process.  It took me a few tries to even get the damn avocados open  without maiming myself.  Really though, last time I made Guacamole, I chopped my finger tip riiiiiight off (see picture right).  I bet that made you hungry...

But seriously, it's all a matter of tasting, adding and learning from your mistakes.  If you don't like something, don't add it.  I'd rather Cilantro and I never have an affair, so I abstain.  But, some people love this preposterously over-powering herb and to you I say: felicitaciones.  Some people like it saltier, gross, but okay, do it up.  Some people don't like tomatoes (specifically most people I hang out with for some weird reason).  Also wrong, but whatever, leave 'em out.  I've had Guacamole so chunky and filled with things I'm not even sure that there's avocado in there.  And then I've had Guacamole that was literally mashed up avocados with a dash of salt.  But here's mine, the some-where in between perfection of what guacamole should be. (wow I sincerely apologize for how confident I am apparently feeling about this guacamole right now)

what you need...
3 Avocados, peeled and pitted
3 Cloves of Garlic, chopped
1/2 of a Red Onion, chopped
10 - 15 Cherry Tomatoes, chopped (optional)
Juice from 1 lime (don't you dare use that fake stuff, limes cost 25 cents)
Dash of Black Pepper
Salt to taste (about 2 tsp)

1  Do all that chopping listed above, because I know you didn't show up here with all those vegetables pre-chopped and if so, touche, and a little weird.  I also kinda wanna know where you buy your pre-chopped vegetables.  Here's a picture of everything peeled, pitted and chopped up for you to look at while you slave away, wishing you were at this stage:


2  Put it all in a bowl (as picture above), and using a masher, mash it all up.  Taste it, fix it, and enjoy it.  And yeah, seriously, it's that easy!


note  Although this is largely irrelevant seeing as there won't be left overs, opened avocados will turn brown in the air/ refrigerator due to some scientific nonsense that makes them react much like bananas.  To preserve guacamole in the refrigerator, squirt lime juice over the top before storing and toss in the pit of one of the avocados.  Still, don't expect a massive shelf life.

For those of you who don't like Mexican food, Guacamole, or just Mexico in general: we'll move on tomorrow...  I promise.