Friday, January 27, 2012

Teach Me How To... Salsa?

I love homemade salsa!  Nothing beats the fresh, yummy taste of a hand made, not-from-the-jar salsa.  Newman's Own peach salsa comes pretty damn close.  Close, but no cigar.  I've made your regular tomato salsas, and even a pineapple salsa before.  But this week, we're making MANGO SALSA!  And wait till you see what we're going to put this bad boy on!

what you need...
One mango, diced/ chopped into small cubes
1/2 red bell pepper, diced/ chopped into small cubes
1/2 red onion, diced/ chopped into small cubes
Juice from 1/2 a lime
Salt

what you need to do...
1. Combine all ingredients in a large bowl and mix so that everything is coated by the lime juice. Enjoy with chips or the very delicious meal soon to be posted up here...

Thursday, January 26, 2012

Offspring Cheeses, Hybrid Condiments, and Avocado Enhancements

Whomever invented the sandwich is a genius and must be very rich.  The sandwich is the answer to the age old issue of, "how do I pull this all today".  Oh well, it's easy, just pop it all in bread and slap it in the panini press (or in our case, the oven).  This is an absolutely delicious meal-- in fact, it's so good, it's been on the weekly menu two weeks in a row.  And I'm not ruling it out for next week.  It's quick, cheap and super, super yummy. You will absolutely never go to a sub shop for a chicken sub after this one, at least I hope not.


Why so yummy, you ask?
1) Pepper-American Cheese-- yes you heard me right.  My roommate first mentioned this hybrid breed to me last week and I figured, sure, let's give it a try.  It is what happens when pepper-jack and american cheese sit next to each other in the deli counter for too long, and decide to get weird.  It is the creamy offspring of a creamy, flavorless cheese and a sharp, spicy mate.  I can't imagine that you aren't already on your way out to get some by now...
2) Siracha Mayo-- the delicious fusion of a boring, eggy condiment and it's way better, sassy cousin.
3) Avocado-- yes, avocado.  This is the most important part.  There is avocado, and things only get better when you add avocado.  Don't pretend that's not the absolute truth.
So let's mate some cheeses, whip up our own condiment, and enhance by avocado.

what you need...
1 piece thin cut chicken
1/2 avocado, sliced
1/2 tbs mayonnaise
1/2 - 1 tbs Siracha sauce (depending on desired spice)
2 slices pepper-american cheese
1 sub roll
1 egg
Italian breadcrumbs
Olive oil
Lettuce (optional topping)
Tomato (optional topping)

what you need to do...
1. Turn broiler to high, cut open sub roll, and being sure to not rip all the way through, spread the sub roll open on a baking sheet and place in oven for 1 minute to toast the inside of the roll.  Remove from oven, set aside, and leave broiler on.
2. In a medium skillet, heat 1 tbs olive oil over medium high heat.  Crack and egg into a bowl and beat until yolk and white is completely combined.  Dump some bread crumbs onto a small plate.  When oil is hot, dip chicken in egg, being sure to coat both sides, and then into the bread crumb mixture, being sure to coat both sides thoroughly.  We're breading the chicken here, if you haven't gathered that by now.  Transfer chicken on the the pan and cover.  Cook until the chicken is cooked through, being sure to turn often to prevent burning.  Reduce heat to medium if needed)
3. Once chicken is cooked through, strain on a paper towel, and cut into strips.  In a small bowl mix mayo and Siracha sauce, adding more of less Siracha to attain desired spice.  Spread onto sides of the roll.  Add avocado slices and chicken to sub roll, and top with cheese.  Place sub back under the broiler for 1 minute to melt cheese.  Top with optional toppings of lettuce, tomato, red onion, or anything else you like putting on your subs.  As you can see, I didn't do this mainly because I had none of these things.
I APOLOGIZE FOR THE TERRIBLE QUALITY OF THESE PHOTOGRAPHS--I FORGOT MY CAMERA WHEN I WAS MAKING THESE AND BORROWED A FRIEND'S IPHONE TO TAKE THESE PICTURES.  

Wednesday, January 25, 2012

R-Rated Coffee Milkshake Part II

So one day a week or so ago I had to have a coffee milkshake.  Since I've had one, of course, but on that particular day, my necessity was accompanied by and overwhelming lack of motivation.  I decided not only did I not want to pay for the ingredients necessary, but I also had no desire to move from the kitchen table.  So, we did a little bar tending, and created this fantastic after dinner dessert drink.  Enjoy part two of the R-rated coffee milkshake saga.


what you need...
3 oz chilled bold black coffee
1.5 oz Patron XO Cafe 
2.5 oz Godiva White Chocolate Liqueur 
Ice


Obviously, what you're going to need to do here, is mix all these ingredients together and enjoy this absolutely delicious dessert/ drink creation! :)

Wednesday, January 18, 2012

Yes Hi, May I Place An Order For Delivery?

Ahhhh take out Chinese food.  Have we ranted about this before? Oh wow, it's turns out we have.  Unsurprising.  Well, if you think I am about to do an entire post about some earth shattering, ground breaking take out Chinese food experience... I'mnot.

In fact, I'm totally going to throw you off with this post, and we're going to talk about DESSERT!  More specifically cupcakes.  Get ready all you Cupcake Wars fans; I'm about to collect a couple of friends and blow you away.


We had a friend who most recently got back from studying abroad in China for a year.  A whole entire year!  It was so long, and when he got back, we knew we had to do something special, Asian, and unforgettable for his homecoming.  So naturally, Chinese food take-out cupcakes seemed to be in order!  When he left, we prepared him a "fortune cookie cake" which was in fact exactly what it sounds like-- a cake made out of nothing but crushed up fortune cookies and paper.  Actually just a vanilla cake in the shape of a fortune cookie with awkward colored frosting that took one hour to mix into the perfect hue of "fortune-cookie yellow", with a piece of paper sticking out of it.  Cool, but more than rivaled by these bad boys.


The base was a simple vanilla cake mix, but the toppings, well, those were a different story.  There were fried rice cupcakes and fortune cookie cupcakes.  And they were awesome.  Thanks to Sherry for her dedication to this project and the idea/ book containing the idea for these cupcakes.  Thanks to Brittany for her manual labor and sticky hands while making these cupcakes.

I don't think I am going to tell you how to make these cupcakes, just because I can do that.  I'm going to let you look at them, and tell you what's in them.  They are simple boxes vanilla cake mix, spruced up with a bit of homemade buttermilk and baked like normal cupcakes typically are.  Some of the tops baked up too much, so we had to cut the tops off of some of the ones we used for the fried rice cupcakes.  The fortune cookies were made by melting soft caramel chews in the microwave for 10 seconds, rolling them out on wax paper, and using a circular mold (opening of a cut) to press a template we cut out with a knife.  Those were then folded into the shape you see there.

The fried rice was made by using a variety of candies such as halved green jellybeans (for the peas), cut and cubed orange tootsie rolls (for the carrots), pink laffy taffy (for the pork), yellow laffy taffy (for the eggs), and green laffy taffy (for the chives).  It came together using a bit if vanilla frosting, tinted with cocoa powder, which was mixed in a bowl with rice krispies and the candies.  Additional candy was added to the top for effect.  Get the book if you want to do it... otherwise, marvel over these!


Testimonials:
"Zis cupcake is a yes for me!" - Russian Guy from Cupcake Wars

Tuesday, January 17, 2012

Do You Have Two Hands, A Measuring Cup, and an Oven? Okay Good, Then You Can Make This.

I'm running out of things to say today.  So I'm going to make this one short and sweet.  It was a simple, plain, but delicious meal.  So I'll give you a simple, plain and delicious overview of the meal.

Chicken.
Lemon.
Orzo.

A thing of beauty.  The meal that just keeps on giving, especially when you make one pound of orzo and one pound of chicken.  This meal is so simple that it almost didn't make the blog.  But then it was SO delicious.  So it did.  When I was making it, a Realtor walked in to show my apartment, looked at me with surprise, and exclaimed, "Oh a chef!".  False.  You do not need to be a chef to make this.  You need a left and right hand, a measuring cup, and an oven that heats up to 400 degrees.  I had two of those things, yes I'll keep you wondering on what one I'm missing, so I decided to give this a try.


Let's recap.  Chicken.  Lemon. Orzo.  Amazing.
Okay then, what are waiting for?

what you need...
1 lb orzo
1 lb thin sliced chicken
4 oz feta
4 cups chicken stock
3/4 cup water
1 tbs butter
Zest of one lemon
Juice of 3/4 a lemon
1/2 - 1 cup Parmesan cheese
1 tbs dill (or to taste)
Salt and Pepper
Parsley to garnish

what you need to do...
1. Preheat oven to 400 degrees.  In a medium sauce pan, heat the chicken stock, water, and butter until it is boiling.
2. Meanwhile, while broth is heating, in a 3 quart baking dish, combine raw chicken (cut into about 1 inch strips), uncooked orzo, lemon zest, lemon juice, dill, salt, pepper, and feta.  Stir to evenly combine ingredients.
3. When it's boiling, pour chicken stock over the mixture in the baking dish, stir to combine evenly, and carefully transfer into the oven.  Allow to bake for about 35 minutes, or until the mixture is thick and creamy and the orzo is tender.  With the feta in the broth, the sauce should become thick and creamy.
4. Take out of the oven, top with Parmesan cheese, and place back in oven for an additional 5 minutes.  Serve topped with dried parsley!

Monday, January 16, 2012

My Secondo Buona Notte As A Little Italian Grandma

So today we are going to tackle an Italian dish that, because of its laborious nature, is widely avoided as a week night meal.  Being busy with school, graduate school applications, boys, and whatever else this city throws our way, my roommate and I have a hard time seeing each other.  Shocking, I know, since we live together in the worlds smallest "two bedroom" apartment.  To mend our withdrawals, we decided on date night last fall, which, just as it sounds, was us getting together once a week, going out on a date, and ending the night with a bottle of wine and a marathon of Restaurant Impossible (yes, our date night was Wednesday).  Following our binge on foodie happy hours last fall, my roommate and I recently reassessed our bank accounts, and discovered that our weekly dates will now be home cooked meals.  

So for part one of our home-cooked-meal-date-night adventure, we decided to bring in the new year with a bang and decided on [DRUM ROLL PLEASE]......

RISOTTO!

Risotto is... what's a word that means more amazing than amazing?... absolutely bomb.  It is delicious, it's kinda nutritious (depending on what kind you make), and it's a pain in the ass to make!  50 minutes of constant stirring, which, for the first 25 doesn't seem terrible.  Oh no, it's not until it triples in weight at minute 38 and the broth is soaked up at quarter speed do you find yourself asking, wait, why are we doing this again.  But no worries!  Grab a glass of that white wine you just had to open anyways, pull up a stool, and get ready to make one of the more delicious Italian dishes ever... yes EVER.  One bite and it'll all be worth it.  Ask my roommate, she'll testify, this is heavenly!

what you need...
1 1/2 cups Arborio Rice
4 cups (1 large carton) Low-Fat Low-Sodium Chicken Broth
1/2 cup white wine, room temperature
1 medium onion, diced
2 - 3 cloves fresh garlic, diced finely
5 oz sliced baby portobello mushrooms 
3 oz baby spinach
1/2 cup fresh grated Parmesan cheese
4 oz crumbled feta
3 tbs butter
Thyme
Oregano
Salt and Pepper

what you need to do...
1. In a medium sauce pan, heat chicken stock over medium high heat, bringing to a slow boil.  
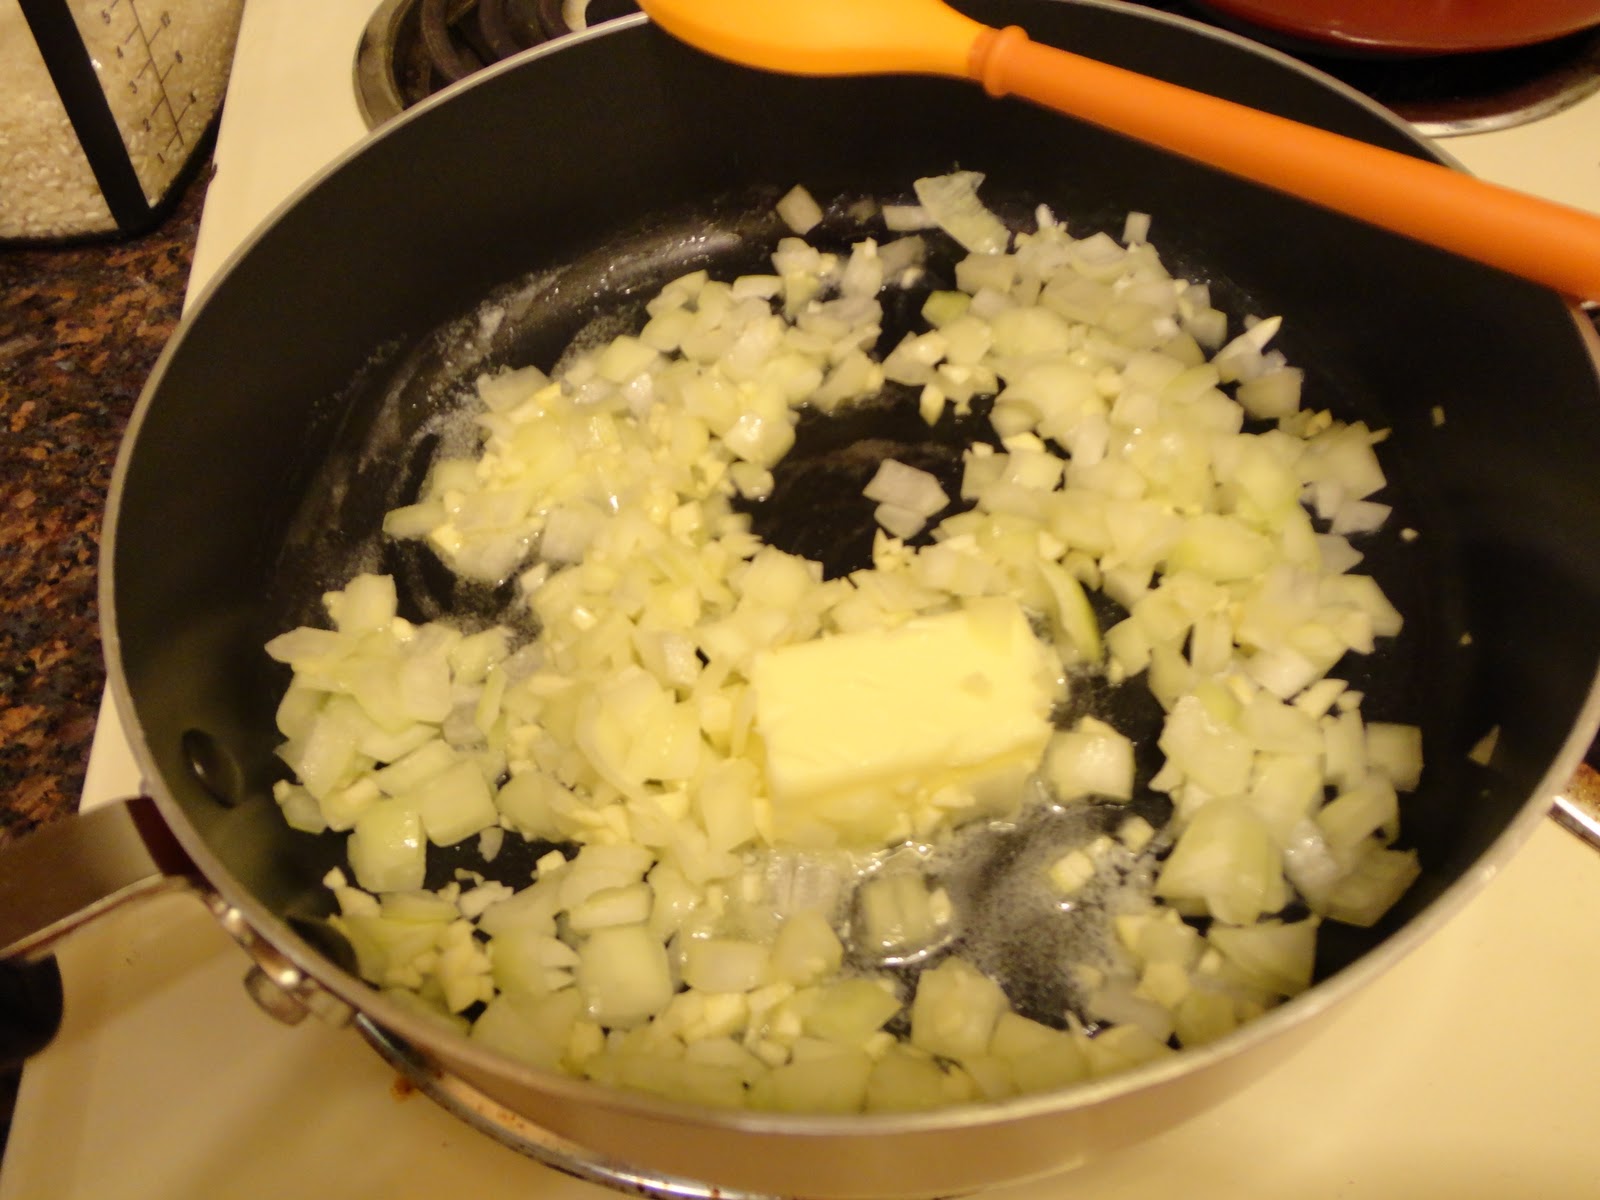
2. In a large skillet with deep sides, add butter, garlic, onion. Cook over medium high heat for about three minutes, or until the butter has totally melted and the garlic and onions have become fragrant.  Add the spinach and mushrooms and cook for an additional 2 minutes.
3. Add the uncooked arborio rice and stir until all grains of rice have been incorporated with the veggies and are covered by the butter.  Cook for about one minute, stirring constantly, and then slowly pour in the white wine.  [It is important that the wine be at room temperature so that it does not hit the heat and immediately cook out].
4. Continue to cook over medium high heat, stirring constantly, until all of the wine has cooked into the rice.    Add salt, pepper, thyme and oregano and stir.  Begin adding the broth to the skillet using a ladle.  In this step it is important that you add one ladle at a time, stir, and wait to add another spoonful until the previous spoonful has been completely absorbed by the rice.  This is the tedious part, and yes, this is going to take about 40 minutes to move through that entire pot of chicken stock.  Repeat this step until absolutely all of the chicken stock has been added to the skillet and is completely absorbed by the rice.  Towards the end, it will begin to become a bit creamier and much thicker than what you started with.  If you are unsure if the rice is cooked enough, you can taste the rice.  It should be tender but still a bit tough, somewhat like al dente pasta.  
5. Remove the risotto from the heat and add the Parmesan cheese and feta cheese, stirring well to incorporate.  Because the risotto is so hot, the cheeses will melt into the mixture.  Be sure to give it a good stir for about 3 minutes so that the cheese is well blended throughout the risotto.  Top with oregano and serve with a glass of white wine and you're good to go!


Sunday, January 15, 2012

Pig Two Ways-- Oink Oink!

So the other night we decided to make pork--a meal which can end in a number of disastrous or delicious ways.  For one, pork is real easy to overcook.  One second it's raw, and the next second it's dryer than the Sahara dessert.  Secondly, pork is pretty bland, that is, it specifically needs an exciting marinade or side dish to spruce it up and take it to that next level.  After making my own salad dressing last week, I decided to do a nice pork and salad.  Naturally, with that being as boring as humanly possible, I began to try to figure out SOME way to liven up this other white meat.  And that's when I remembered bacon.


I mean, what doesn't make sense about pig topped with more pig?  Why haven't I thought of this earlier.  I've seasoned pork, crusted pork, and stuffed pork.  But how have I never topped pork with bacon?!  Erroneous.  But then, pork topped with bacon just sounds kinda nasty and greasy, and like wayyyy too much pig.  So how do we spruce up our bacon topped pork you ask?  We slap some rub on there and prepare a glaze.

This was, hands down, one of the best things I have prepared.  It was SO delicious, SO comforting, and did I mention there was bacon?

what you need...
4 small and thin pork rounds
4 slices of bacon
2 pears
1/4 cup plus 1 tbs plus 1/4 cup more brown sugar (separated in those portions)
1 tbs apple cider vinegar
1 tsp Dijon mustard
1 tbs flour
2 tbs plus 1 tbs more butter (divided)
Cajun seasoning
Cinnamon
Salt
Pepper

what you need to do...
1. At least one hour before preparing the pork, rub each side of the pork with a healthy portion of Cajun seasoning, a dash of cinnamon, 1 tbs brown sugar, and a dash of salt and pepper.  Allow rub to marinate the steak in the fridge.
2. When ready to cook, preheat oven to 400 degrees.  Slice pears into  thin but long slices.  Transfer into round baking pan.  Microwave butter until melted and combine with 1/4 cup brown sugar, stirring well to incorporate.  Pour over the pears and stir to evenly coat.  Place in oven and bake for about 20 minutes, turning occasionally, or until the pears are soft enough to be cut apart easily with a spook.
3. While the pears are cooking, prepare the drizzle for the pork.  In a small sauce pan, combine apple cider vinegar, 1/4 cup brown sugar, Dijon mustard, flour, and 1 tbs butter.  Heat over medium low heat, stirring all ingredients together often to avoid burning.  This should thicken into a brownish glaze.
4. When pears are nearly finished baking (about 5 - 7 minutes left), begin cooking the pork.  Place the pork in a separate round baking dish.  Cut each piece of bacon in half and lay one piece of bacon on each pork round.  Top each pork round with 1/4 of the brown sugar glaze previously prepared and bake in oven for 5 - 7 minutes, being sure not to over cook.
5. Serve pork topped with oven roasted pears and side salad!

Wednesday, January 11, 2012

Ray Charles Vinaigrette

There is literally nothing I can talk about in this post.  It is so self explanatory and for the first time ever... I am at a loss for words.  I literally and most surprisingly have absolutely no stories about salad dressing.  My experiences thus far with salad dressing have been quite ordinary in fact.  I went through my immature blue cheese phase from about 7 - 9 years old.  Then I asked why the cheese was blue.  I moved into my more-mature-but-still-not-quite-there-yet French dressing phase from ages 9 - 12.  I then regressed into a even-less-mature-than-blue-cheese-dressing Ranch phase, which I blissfully enjoyed up until my last buffalo chicken wrap at age 20.  My evolving passion for cooking gave way to a marked improvement in my pallet which brings us to my current phase:  The I-no-longer-need-and-entire-cup-of-dressing-on-my-half-portioned-side-salad Vinaigrette phase.  It is in this most current phase that I have learned to enjoy some of the finer things in life-- balsamic vinaigrette, Italian dressing, and the actually impressive flavor of plain vegetables.  Fascinating.


It is this phase which also brings us to our current food adventure.  I say adventure because we are truly winging it now and getting slightly unnecessary in our decisions.  This week, mainly out of boredom due to my never-really-having-any-class schedule, lack of fitness classes at the gym, and well-founded decision not to drink wine at 1:30pm each afternoon, I decided to create my own salad dressing. Woah, fancy, I know.  I looked up what the basics were in making salad dressings, took into account the meal/ salad type I was preparing it with, and got to work.

Now let me tell you a story about a girl, whimsically making salad dressing, who hastily decides to grate an onion.  I'll skip to the ending of this unhappy tale-- I BURNED MY F[EXPLETIVE] EYES OUT.  I seriously though I had pulled a Stevie Wonder as I feverishly rinsed my eyes with nearly a gallon of water.  Needless to say, it wasn't worth it however, the grated onion surely did add a great flavor without the massive chunks of poorly chopped onion.  All in all though, not worth it.  Just chop the damned onion.

With that being said, lets drive right into it and get started on making our very own, very first, batch of salad dressing that will, from here on out, be referred to as Ray Charles Vinaigrette (or RCV for short).


what you'll need... besides goggles...
3/4 cup extra virgin olive oil
1/4 cup plus 2 tbs Apple Cider Vinegar
2 cloves fresh garlic, finely chopped
1/2 yellow onion, not grated, finely chopped
2 tbs dijon course ground mustard
1/2 - 1 tsp white granulated sugar (depending on desired sweetness)
Thyme
Basil
Cracked Sea Salt
Fresh Ground Black Pepper


I'll bet you can guess what you need to do next...
1  Combine all ingredients in a large measuring glass.  Stir together vigorously, then transfer to a storage bottle (I used an old oil dispenser) and store in the refrigerator until ready to use. 

Tuesday, January 10, 2012

Kimi's Crappy Reduction Meets Some Awesome Stuffed Mushrooms

My family had it's annual Yankee-Swap-Annual-Christmas-Fun-Festival last weekend.  What could be better than good people, good food, lots of drinking, and typically horrendous yankee swap gifts?  Nothing.  This year the LaSalle family affair was held at my house in New Hampshire and so naturally, I decided it necessary to go all out and add some flair to some old recipes of mine.  Baked brie would be absolutely essential, and stuffed mushrooms were a must.  But I was tired of the boring basics of wrapping a brie in Pillsbury dough (not that there's anything wrong with that) and mashing up some sausage and Italian bread crumbs to shove in mushroom caps.

After a brief chat with my uncle, followed by an extensive birthday lunch (for him), and shopping for this hideous yankee swap gift which has found it's place as a fancy new adornment to my kitchen wall...

Beatrice not only has a place on my kitchen wall, but also a permanent place in my heart.
A warm and special thanks to Tom and Santy for this most wonderful apron.

... I figured out (with the help of my uncle of course) the perfect appetizers to prepare for my family's enjoyment!

Baked Brie with a Red Currant Reduction
Sausage, Panko, Gruyere and Apple Stuffed Mushrooms

There was just one teensy weensy little problem... I had never in the entirety of my short life, made a reduction.  I had no clue where to start and needless to say, I seem to have messed it up quite terribly.  The good things:  the flavor was fantastic, it was quite fun to make, it went well with the baked brie.  The bad things: I mayyyy or may not have over-reduced it, and it mayyyyy or may not have turned rock solid.  Okay, let's do it anyways and we'll fix this little over-cooking issue while we're at it!

Baked Brie with a Red Currant Reduction 
what you need...
1 medium-large wheel brie (can have skin still on it)
1 package of Pillsbury crescent roll dough
3/4 cup Red Currant jam
~1/4 cup Merlot (just enough to cover the bottom of the pan/ jam)
1 - 2 tbs butter


what you need to do...


1  Preheat oven to 375 degrees.  In a medium sauce pan, combine red currant, butter and Merlot.  Heat over medium heat, whisking often, until mixture begins to bubble.  Reduce heat to low and continue to cook, whisking constantly, until a thick but not gooey, syrup has formed.  Remove from heat and use immediately.
Okay here's an essential tid-bit of knowledge you will need in order to succeed where I failed.  Under NO circumstances, should you decide to shower at any point during this step.  This will prove HIGHLY destructive to your reduction, and will give you bad results. Do we understand eachother?
2  On a cutting board, lay on the brie and cut or scoop (I used an ice cream scoop) a hole in the center that is only deep enough to go about half way through the brie. This is where we will stash the reduction.  Move the brie from the cutting board and roll out the crescent roll dough, squeezing together any holes.  Place the brie in the center of the dough. 
3  Pour the reduction into the hole in the center and carefully drizzle over the rest of the cheese.  Quickly fold the crescent dough around the brie so that it is completely covered, and press shut, closing any holes.  If there is extra dough on the top, either remove it or leave it and twist for decoration.  
4  Transfer onto an ungreased cookie sheet, and bake at 375 for about 15 - 20 minutes, or until dough appears golden brown and cooked through.  Remove from oven and serve very warm!


Sausage, Panko, Gryuere and Apple Stuffed Mushrooms
what you need...
1 package of whole white mushrooms (these are the basic mushrooms)
4 links sweet Italian sausage, with casing removed
2 cloves garlic, minced
2 tbs finely chopped onion
1/4 cup finely chopped apple (granny smith works best because of crispness)
4 oz grated smoked gruyere cheese
1 cup panko bread crumbs
1 egg
Olive Oil
Parmesan Cheese
Salt and Pepper


what you need to do...
1  Preheat oven to 375 degrees.
2  Cook the sausage in a pan over medium heat with a dash of olive oil until it is mostly cooked through, breaking it down with a spoon or spatula as you cook.  When sausage is cooked, cool for about 5 minutes, and transfer into a food processor.  Blend until meat is very finely grated, and almost smooth. 
3  In a large mixing bowl, combine ground sausage, chopped garlic, onion, apple, cheese, panko, egg and salt and pepper.  Using your hands, blend thoroughly until all ingredients are combined.  This mixture should turn almost doughy and easy to mold.  You may need to add more panko, or bits of olive oil to either dry it out or moisten it up to desired texture.

4  Remove the stems from the mushrooms so that just the hollowed out caps are left, and wash thoroughly.   Transfer the mixture into the mushroom caps carefully, being sure not to push too hard as they will break.  I usually allow the mixture to pile quite high on top of the mushroom too, but add as much of the mixture as you see fit.  Place in a baking pan and sprinkle Parmesan cheese over the tops.  Bake at 375 for about 30 minutes, or until the mushrooms appear dark grey and the filling appears golden brown.